Hello and welcome! Tatiana here from
Tatiana Craft And Art and I'm so excited to bring you my daily post at Craftin Desert Divas blog!!!
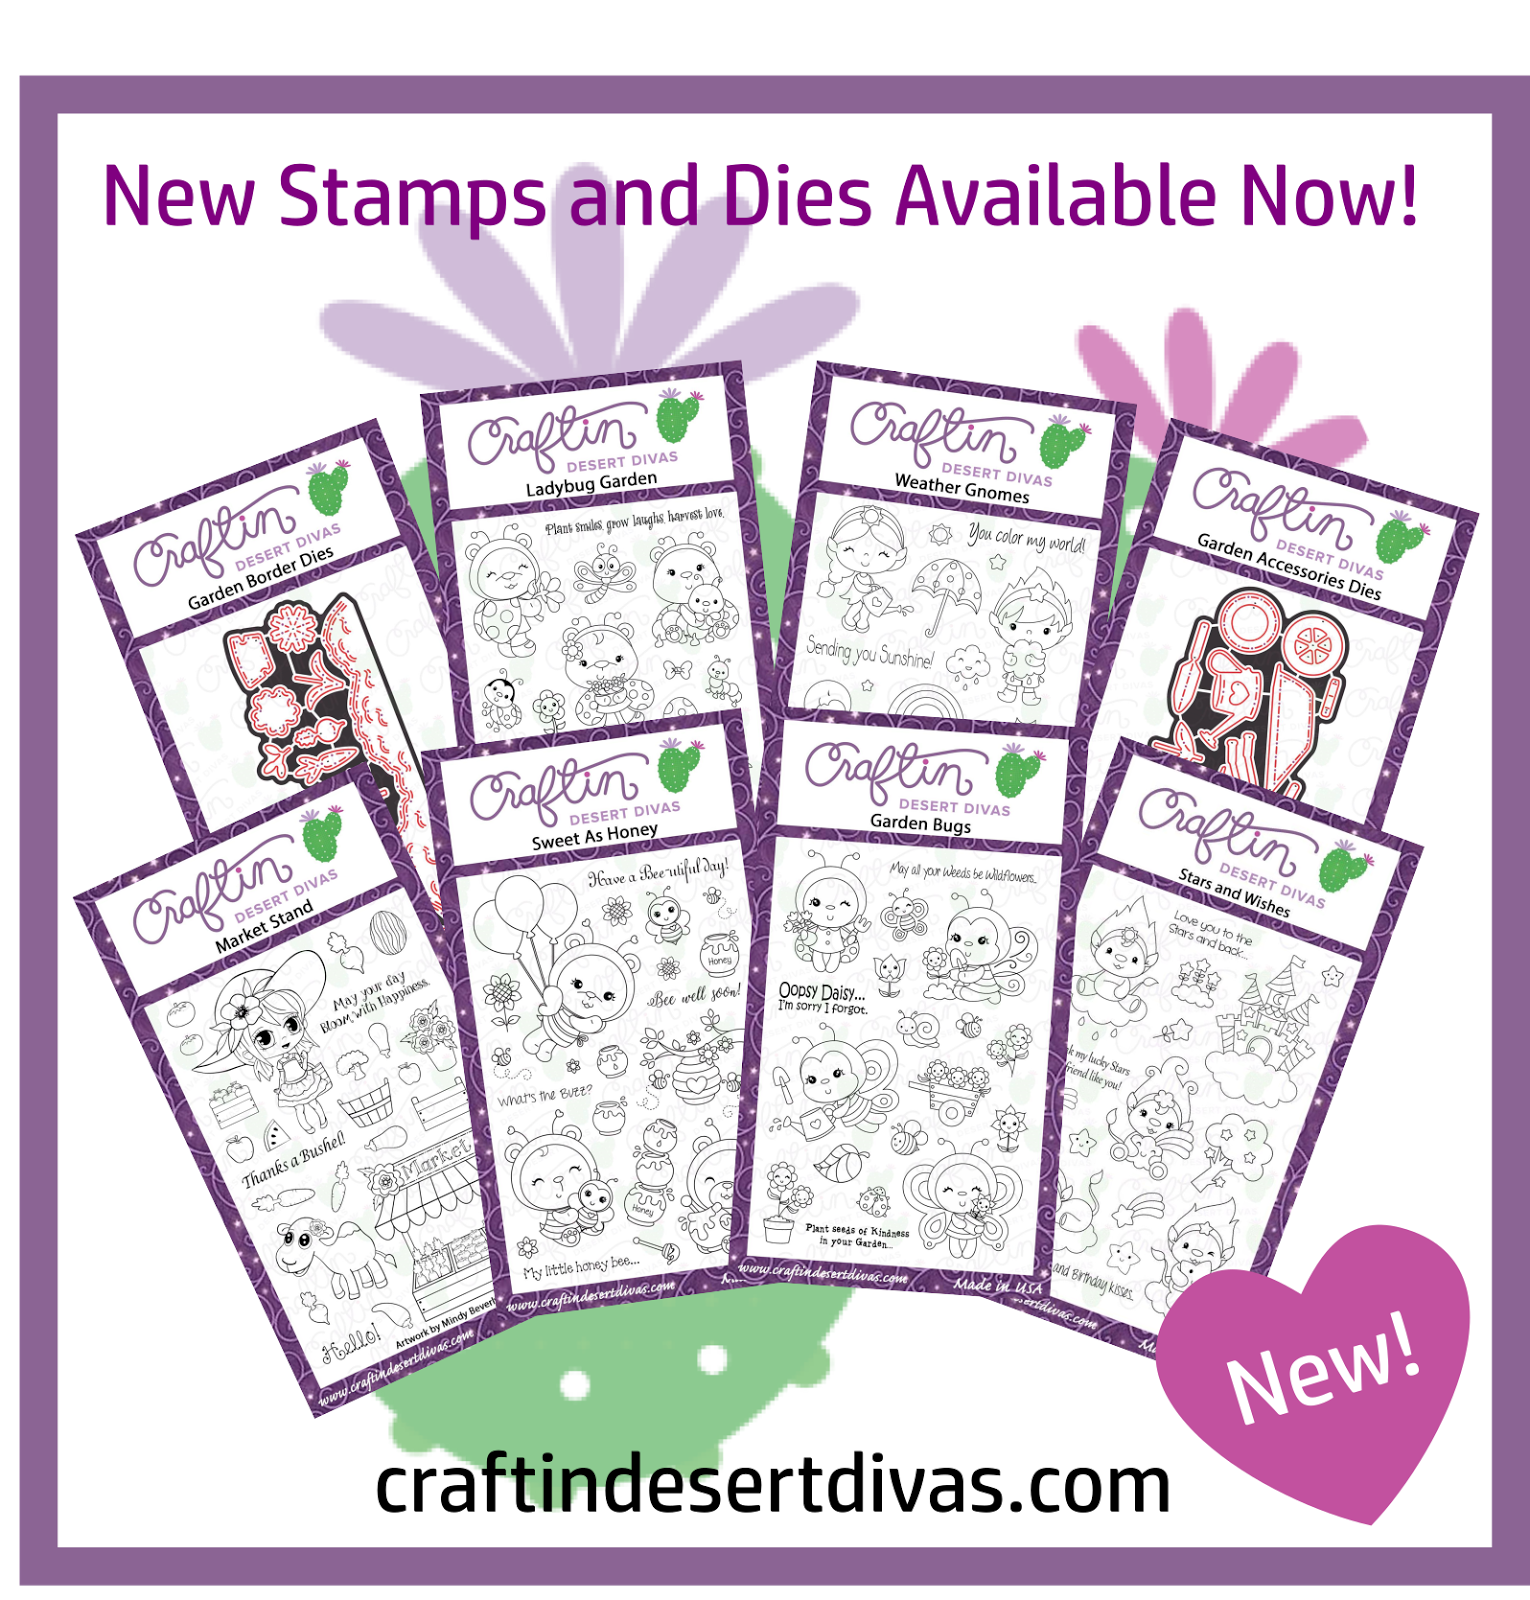
Today is the first day of the Craftin Desert Divas May Release and so I just couldn't help playing with the FANTASTIC new stamps and dies! In fact, I mixed and matched a few new stamps and dies and have two fun projects to share!
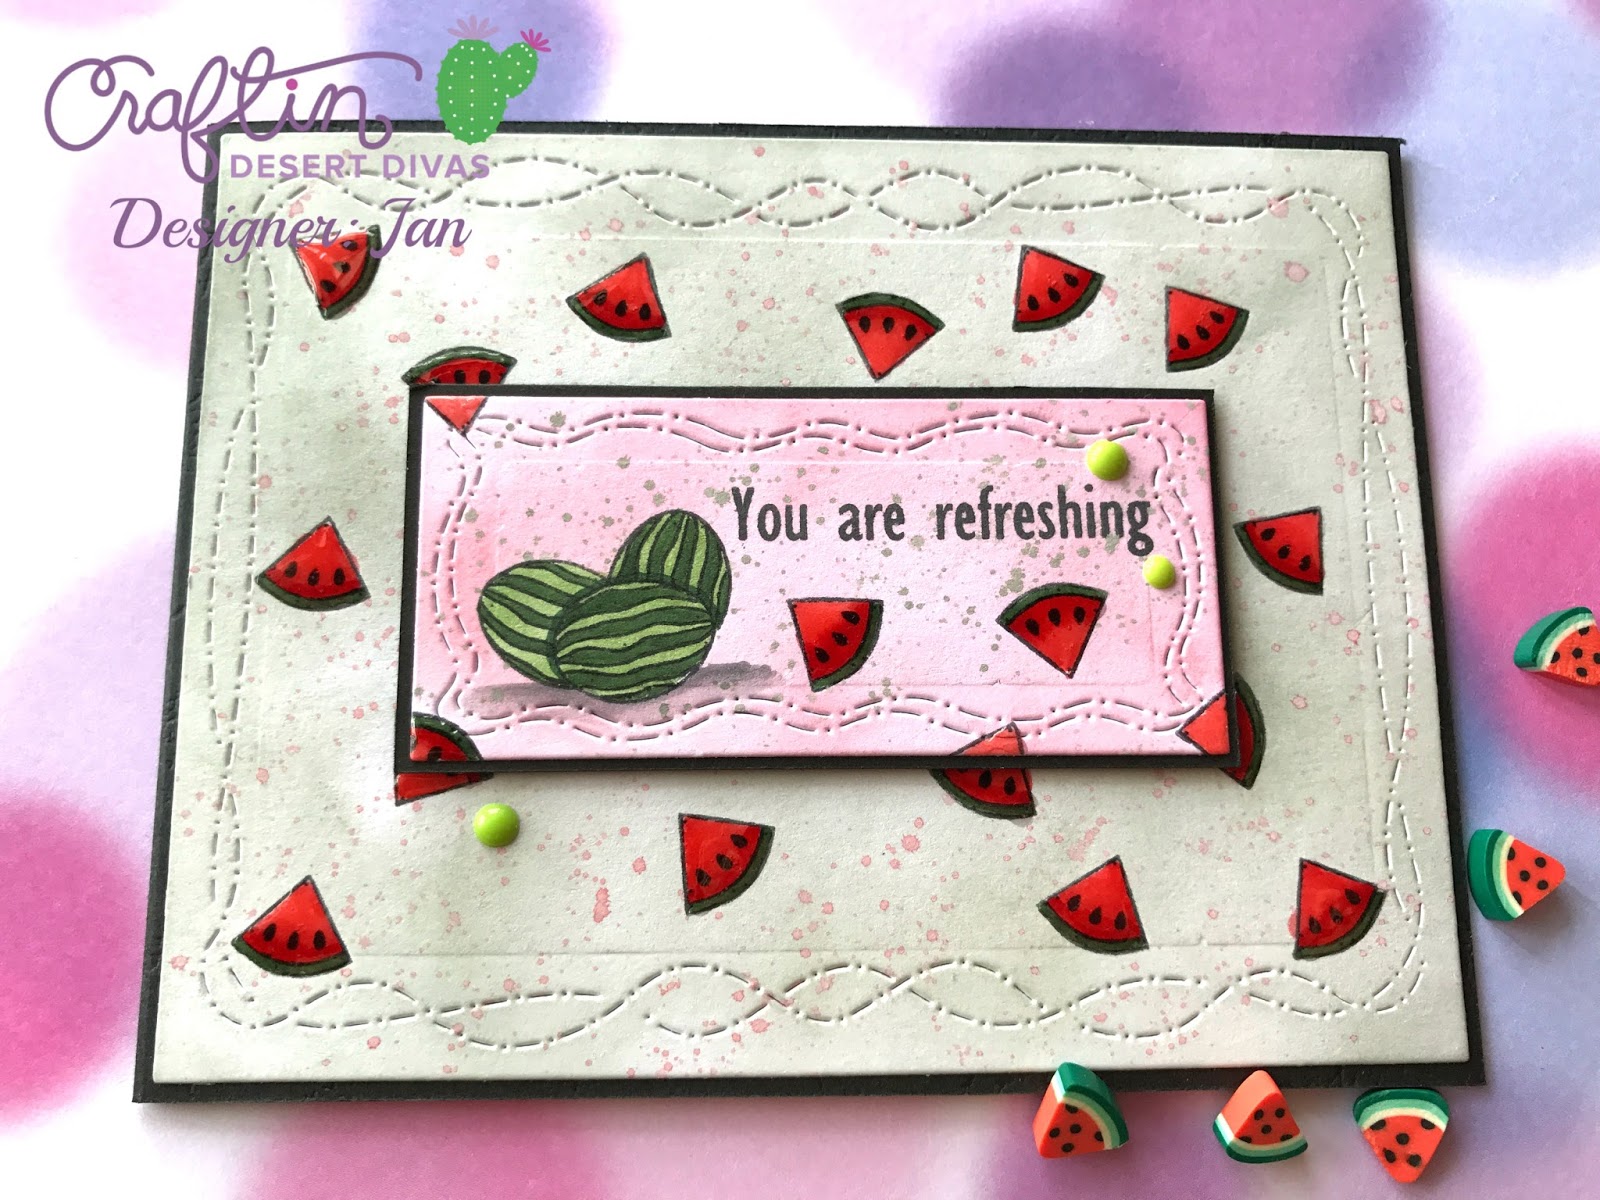
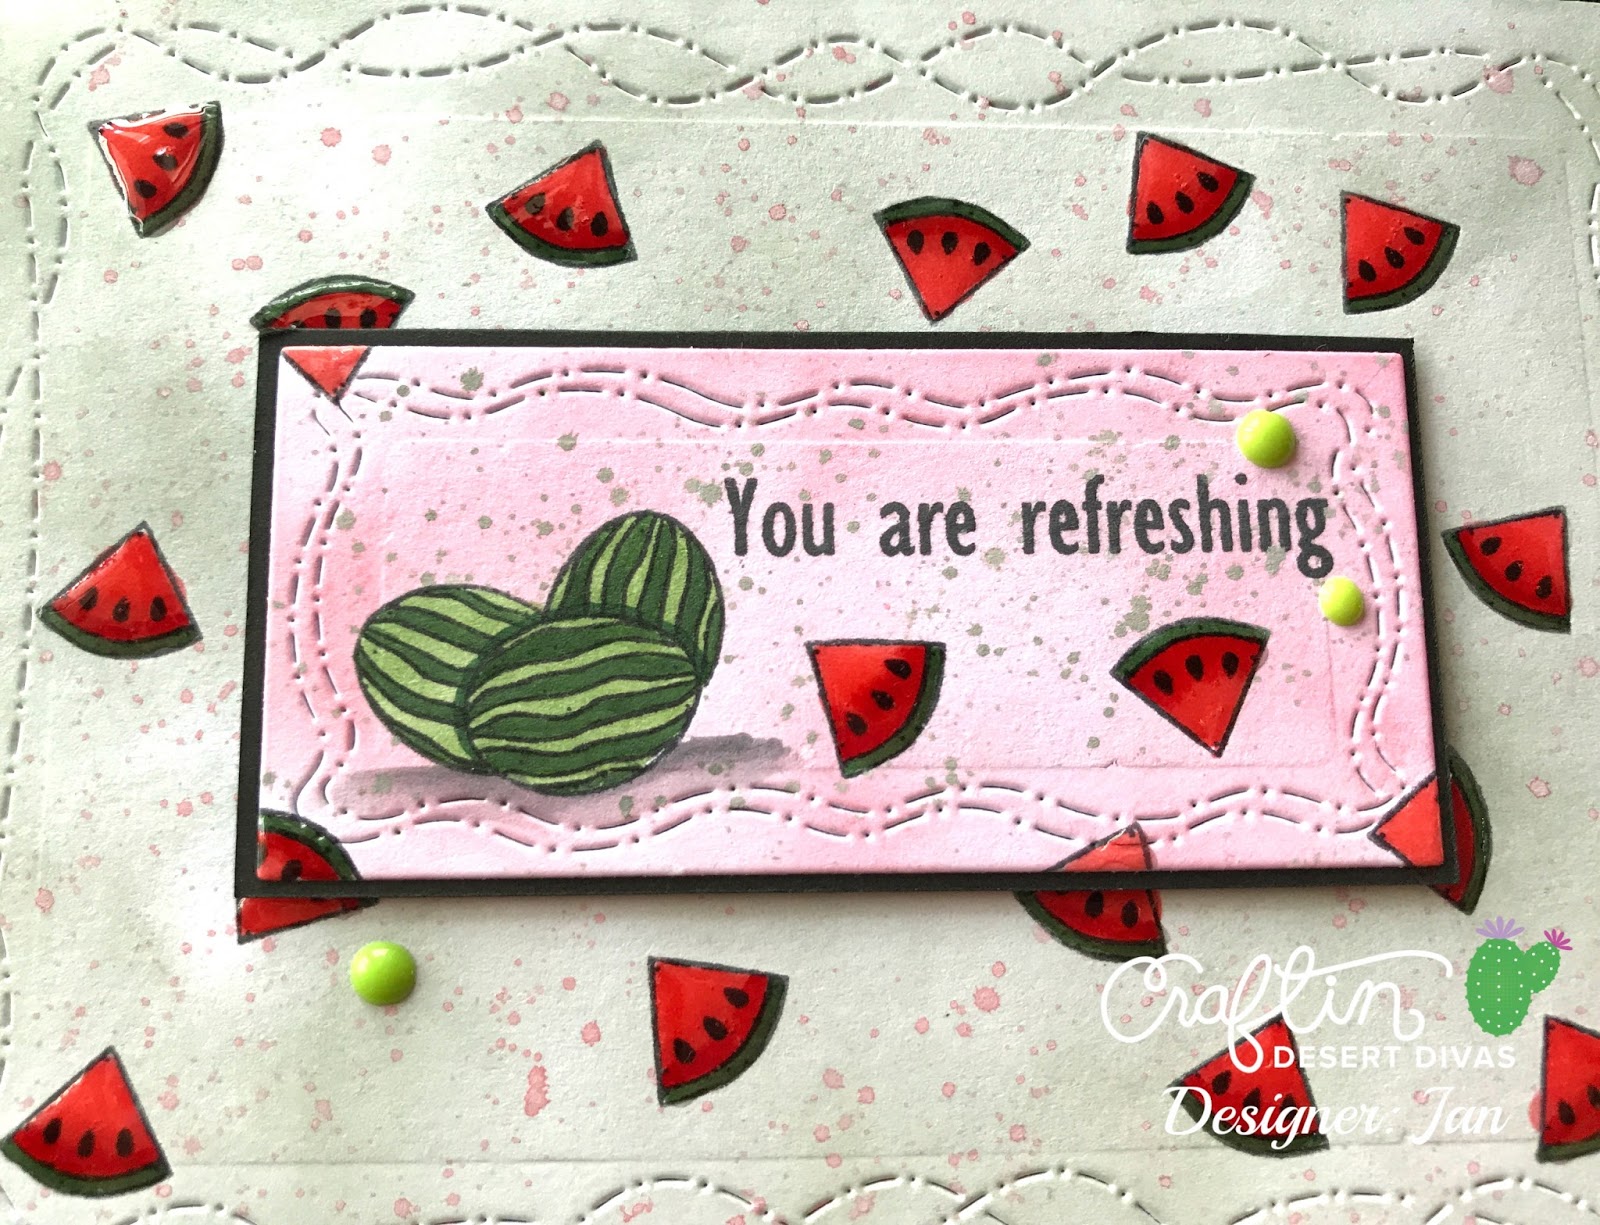
The first clean and simple card features an AMAZING new stamp set. I particularly LOVE this one since it filled with a super adorable images that offer you infinite possibilities of use and suit any kind of paper crafting project: cards, tags, scrapbook layouts, planners, treat bags!
Since the stamps from set are so adorable, I thought that a clean and simple look would be perfect for my card! I started with A2 size card base made out of a Bristol paper and created a non-distractive background, inkblending a very light blue Distress ink from one corner. Then I went a little bit crazy, stamping and fussy-cutting a whole bunch of the images from the set. I worked with a copic friendly paper and ink at this point since my intention was to color everything with copic markers.
Please, scroll down towards the bottom of this post to see all the exact copic marker numbers I used for coloring!
Once completed coloring, I stamped the sentiment from the same set, popped up all the elements on a foam tape and added a few as a finish touch.
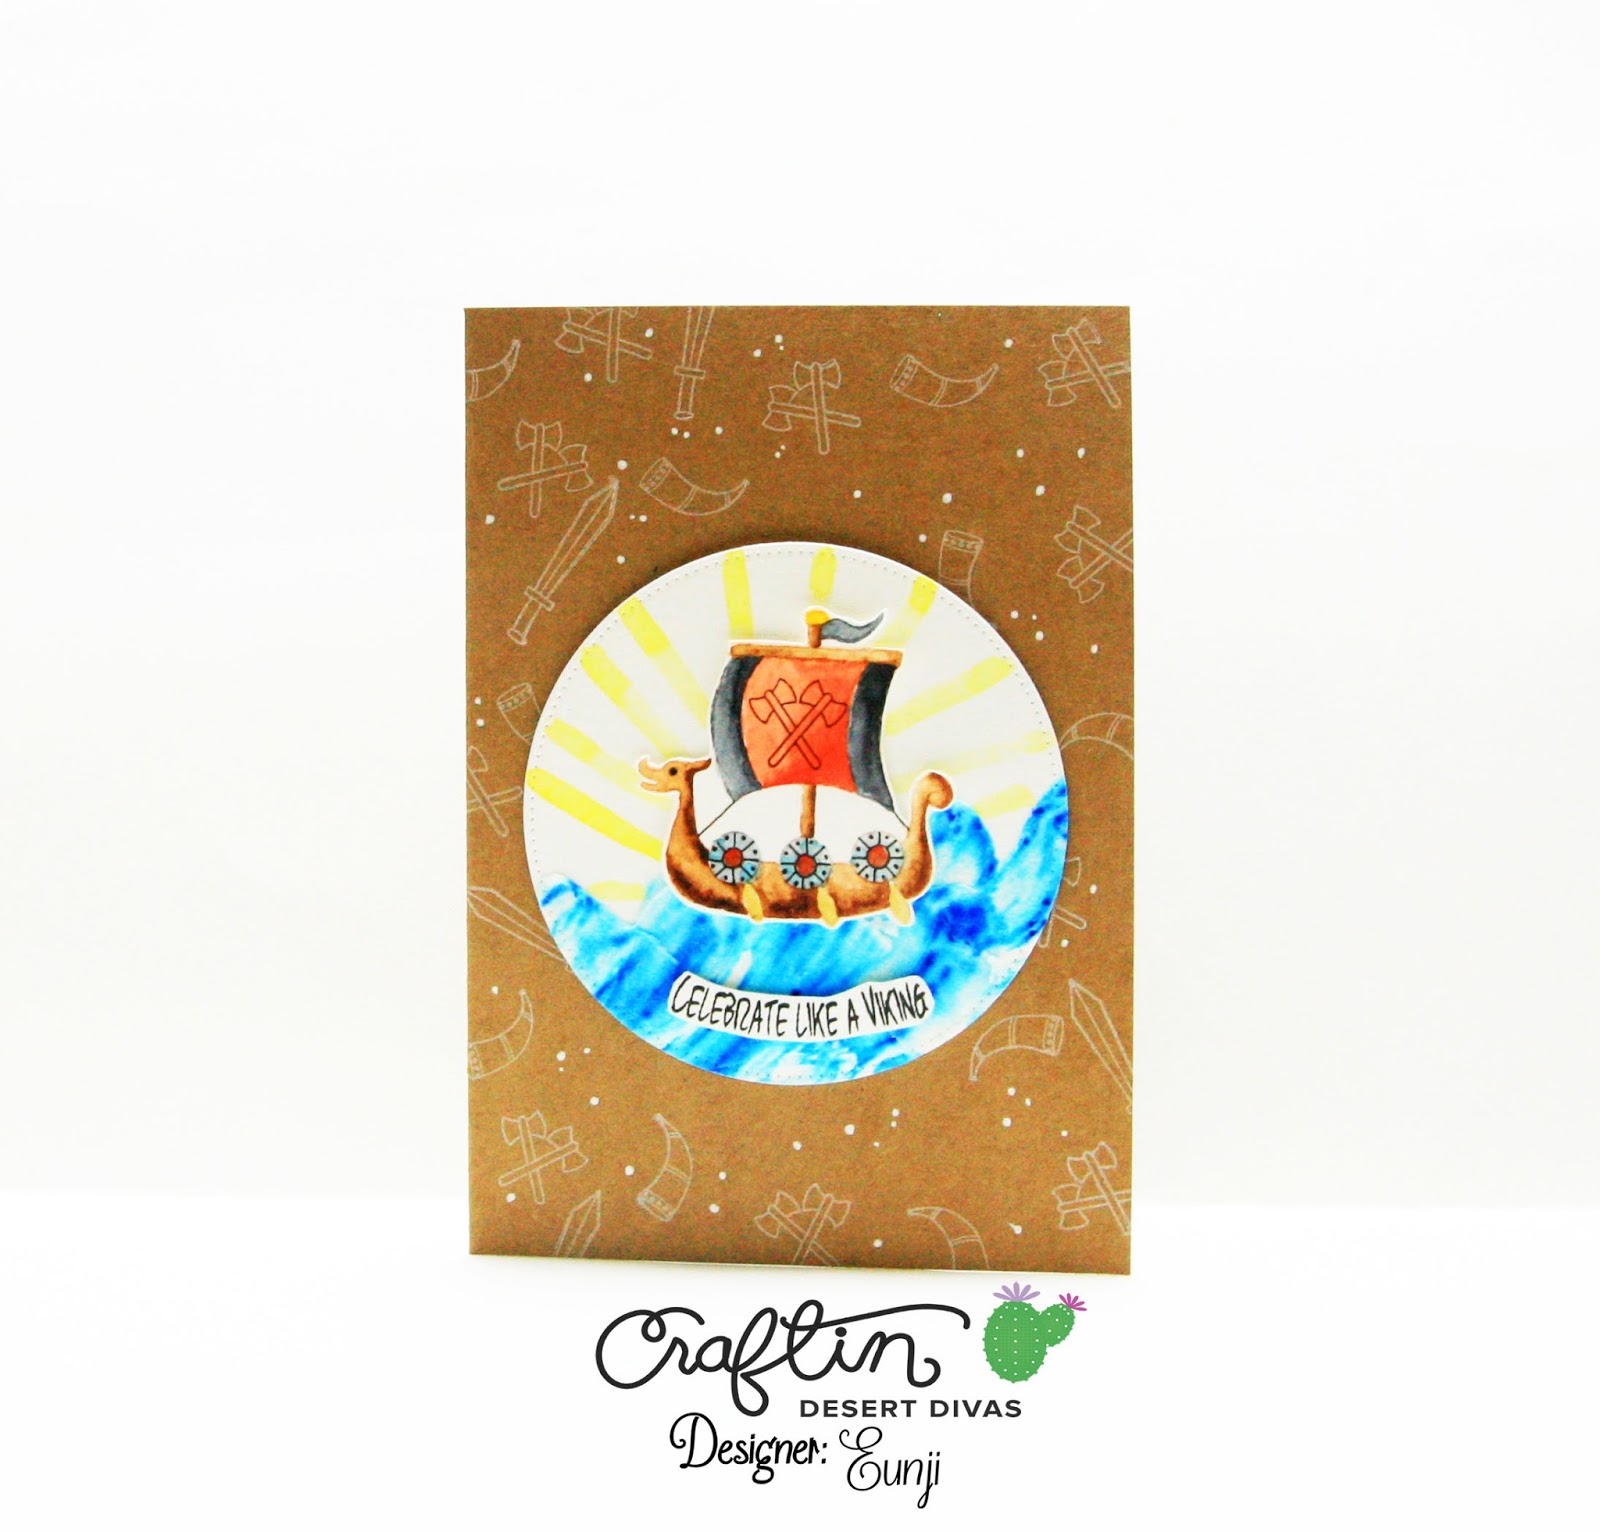
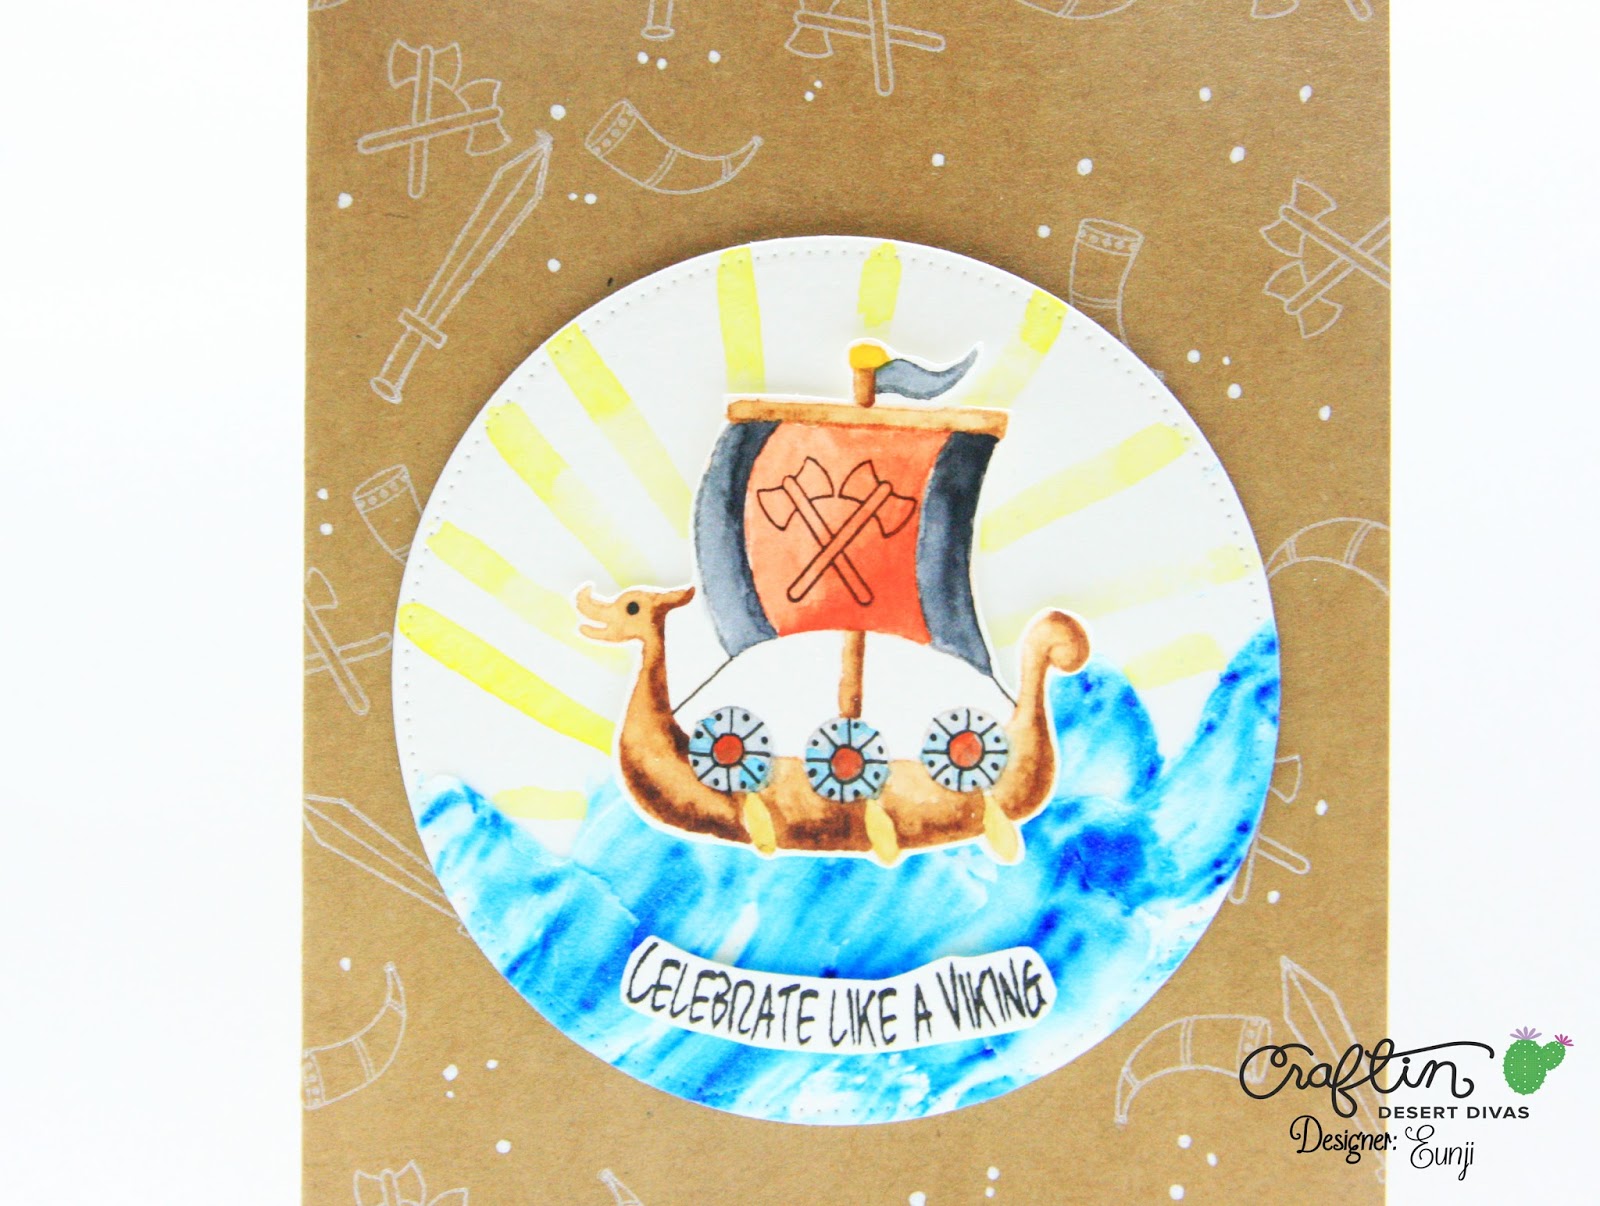
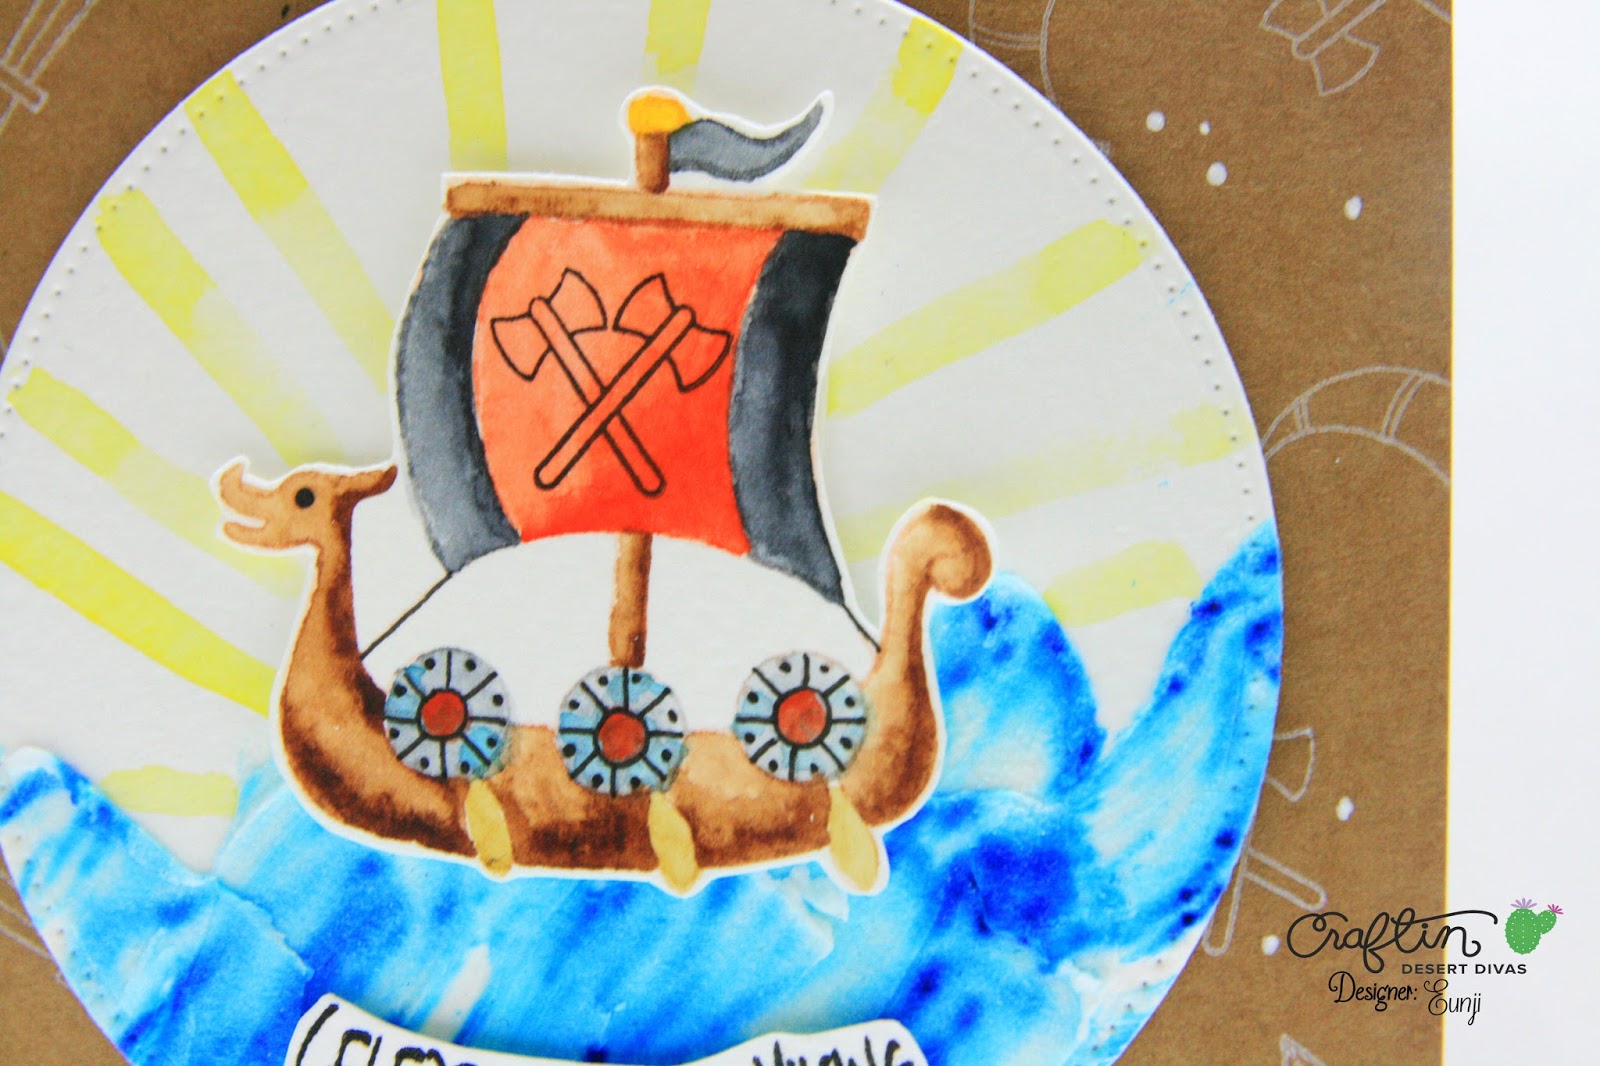
My second card is completely different from the previous one! In fact, I used dies and digital stamps all from the CDD new May release and a few fun watercolor techniques as well! I started with a 3 by 9 inches watercolor panel and the slightly larger coordinating card base that once scored measures 3 ½ by 9 inches. First I die-cut the watercolor paper 3 times using new die set and ended up with 4 more or less equal pieces. I smooched some Distress inks onto a craft sheet, spritzed them with water and put my watercolor paper on top. I repeated the process a few times, heat drying the paper every time. The top die-cut part was colored in a light blue shade since it was going to be a sky portion for my scene, on the others I used a few brown shades, instead, to emulate soil.

While the watercolor elements were drying, I printed on a Bristol paper with a laser printer a few cute digital stamps: , and ; watercolor them with Zig Clean Color Real Brush markers, cut out right against the stamp edge and hide any imperfection from cutting, applying a black marker all around every image.
Finally I literary rooted my carrots into the soil part as die makes the fantastic marks into your paper that allow you to insert any kind of plant inside, and adhered the top part with a foam tape for some dimension and interest. The sentiment from stamp set was simply heat embossed at the bottom with a white embossing powder. That all for today! Hope you like these lovely cards! As always thanks so much for stopping by! And please, check Craftin on Facebook for more inspiration, amazing projects and sneak peeks from the Design Team, freebies and awesome giveaways!
COPIC MARKERS:
crates E30-E31-E33-E35-E37 buckets E41-E43-E44 camel Y21-Y26-YR27-E99-E29 YR000-YR04-YR07 R05-R29 B0000-B01-B04 YG01-YG05-YG09 Y11-Y13-Y17 V01-V06
ZIG MARKERS: n.91 Light Gray - n.28 Pale Pink - n.36 Light Blue - n.63 Ochre - n.60 Brown - n.65 Mid Brown - n.41 Light Green - n.52 Bright Yellow - n.70 Orange
SUPPLIES:


