Monday, July 31, 2017

Pirate Theme Planner Layout

Hello there fellow stamp lovers!! Nancy here from the design team, with another planner layout to share. There is a long standing joke in my family about being descended from pirates. So these digital pirate stamps caught my eye immediately.


This is a layout that came about by chance. When I first downloaded the images, I forgot to download the treasure map. So, in thinking about the map image, I thought it would be really cool to have the map in the background and the pirate images in the forefront. Then, of course, comes "How will I accomplish that"? I wondered if I could print the image on vellum and color it to give it an aged appearance.


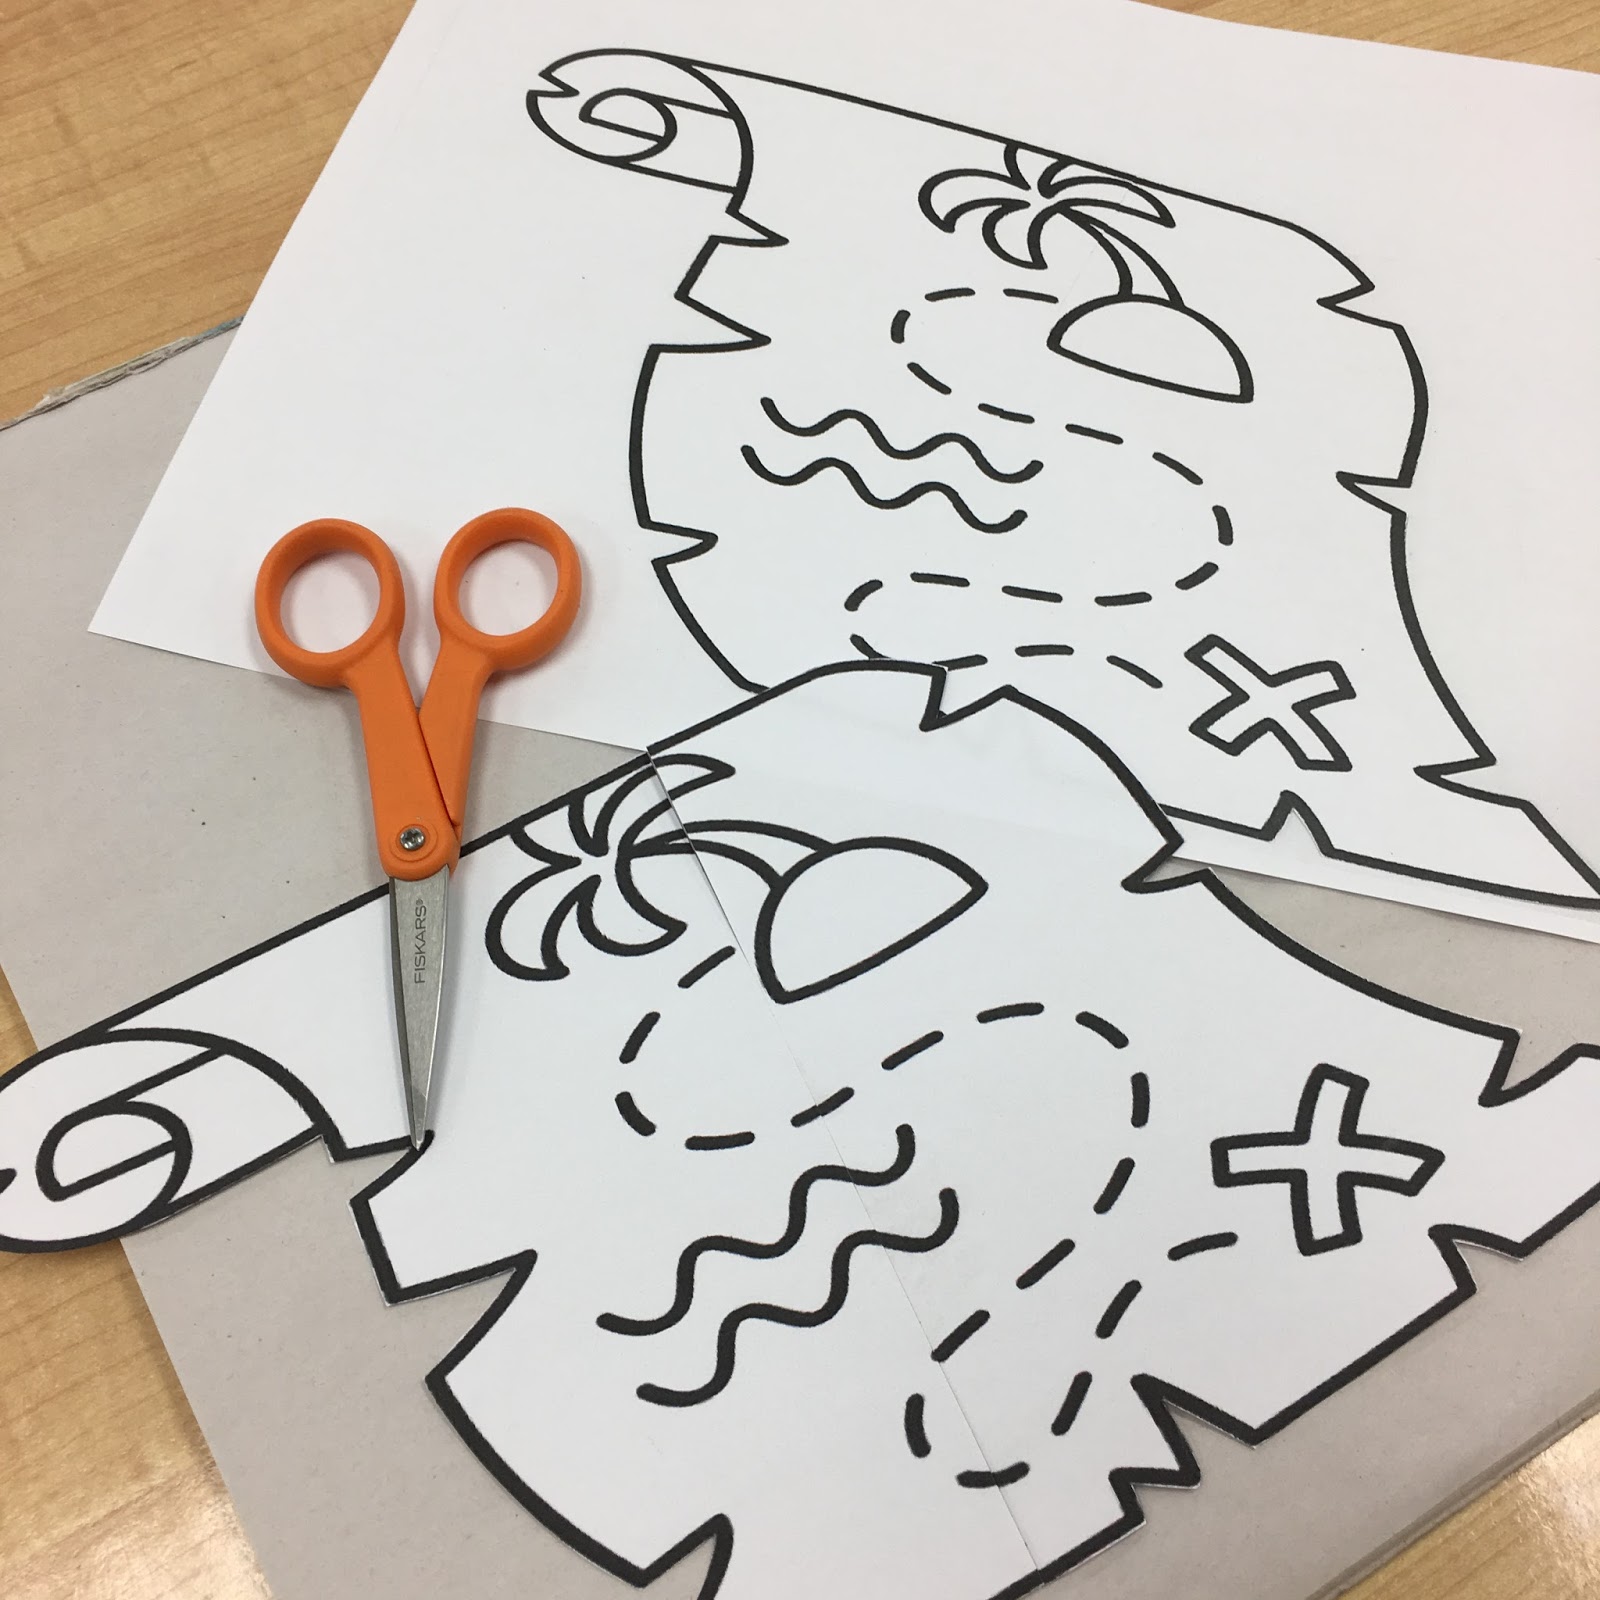
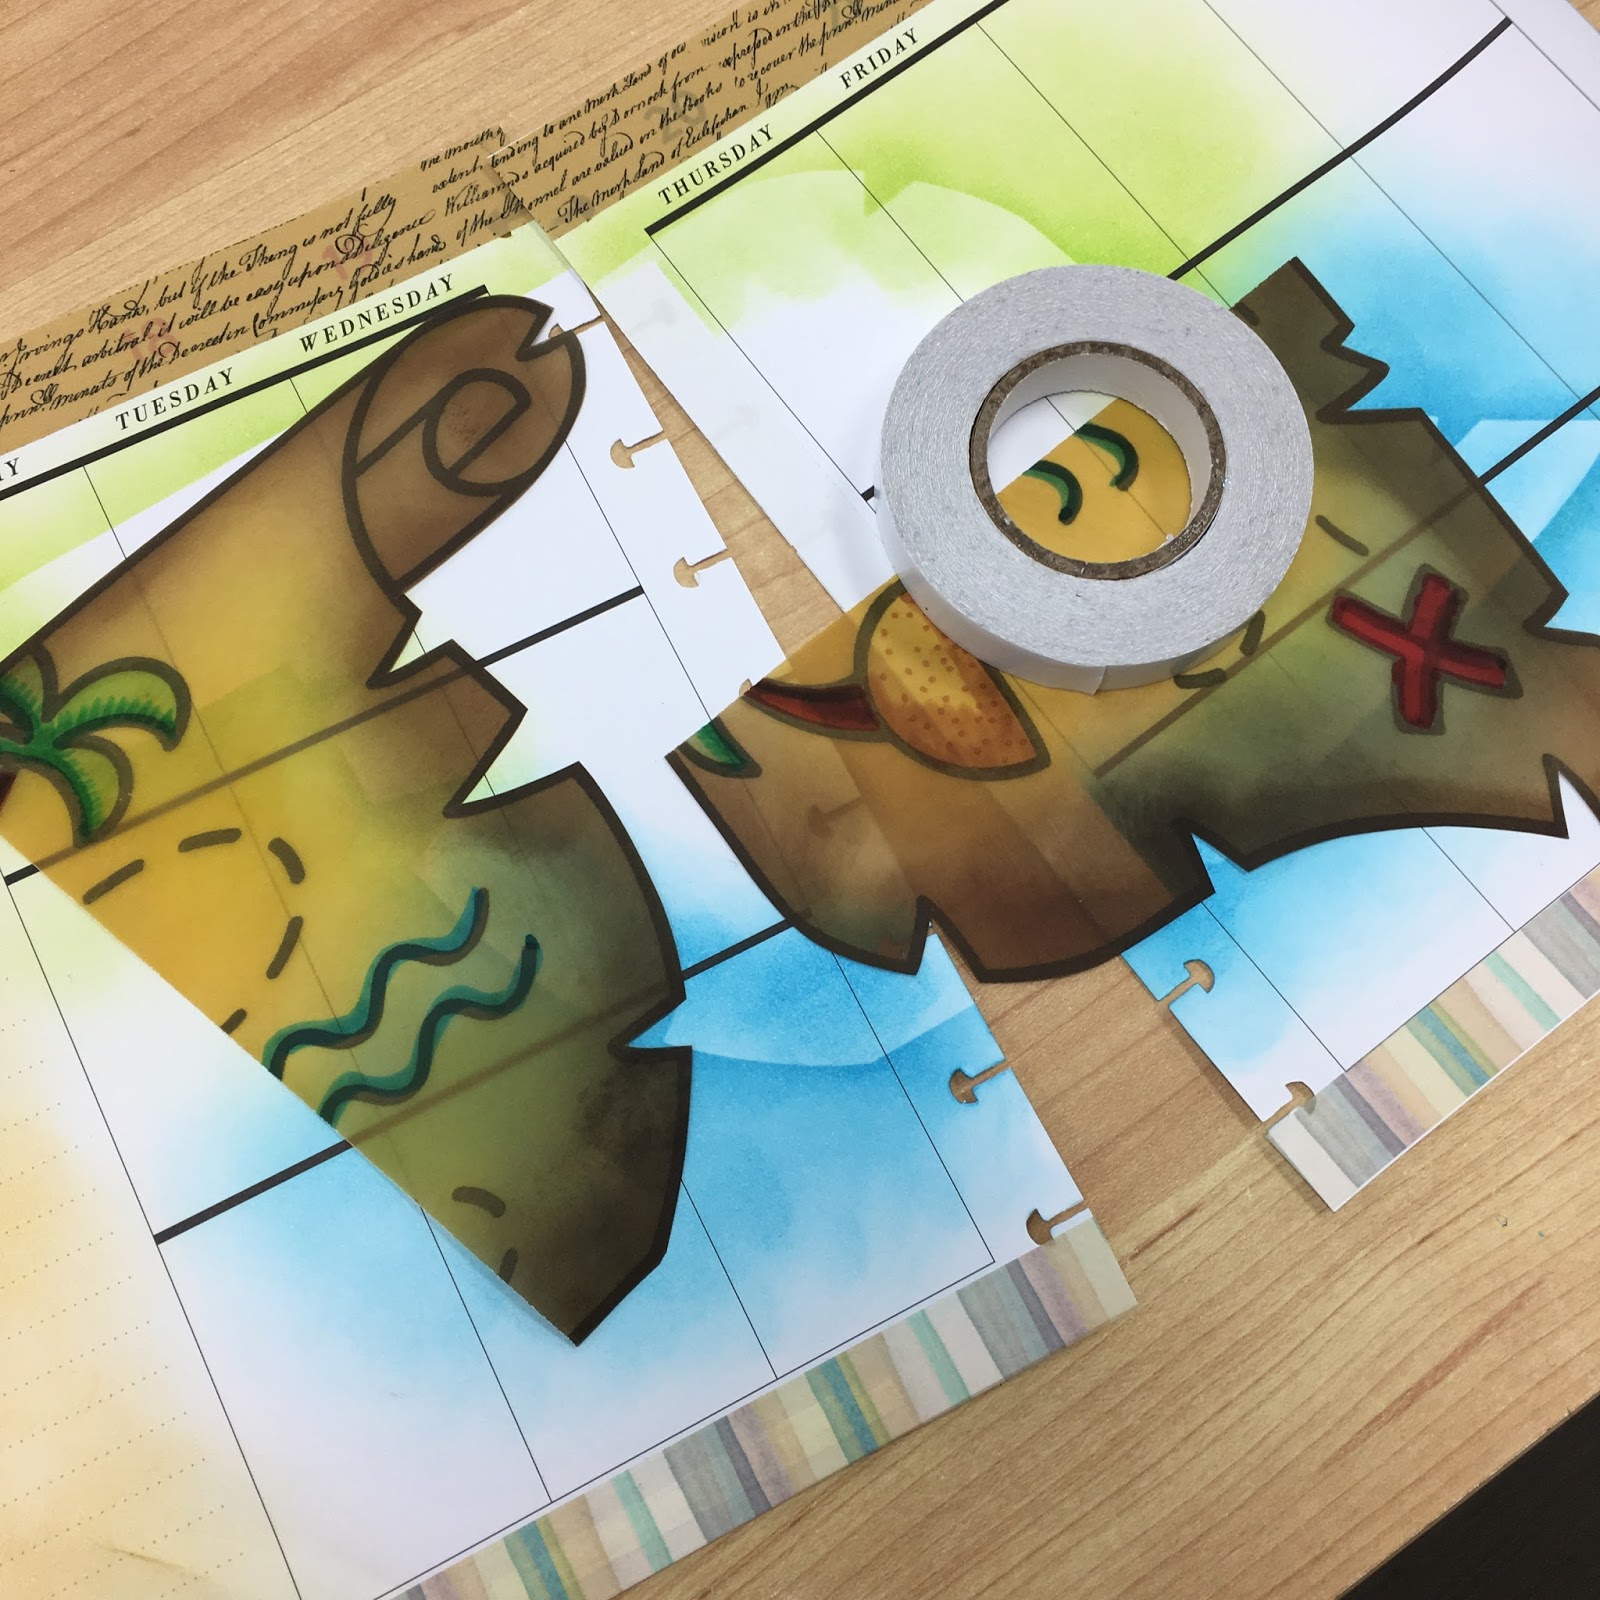
So, that is what I set out to do. First, I enlarged the map image to almost full page and printed it out on copy paper. I cut out the image and traced the map on card stock. I also photocopied the map onto vellum, as I do not have a laser printer. I cut out the map on the card stock and then cut it in half to use as a stencil.


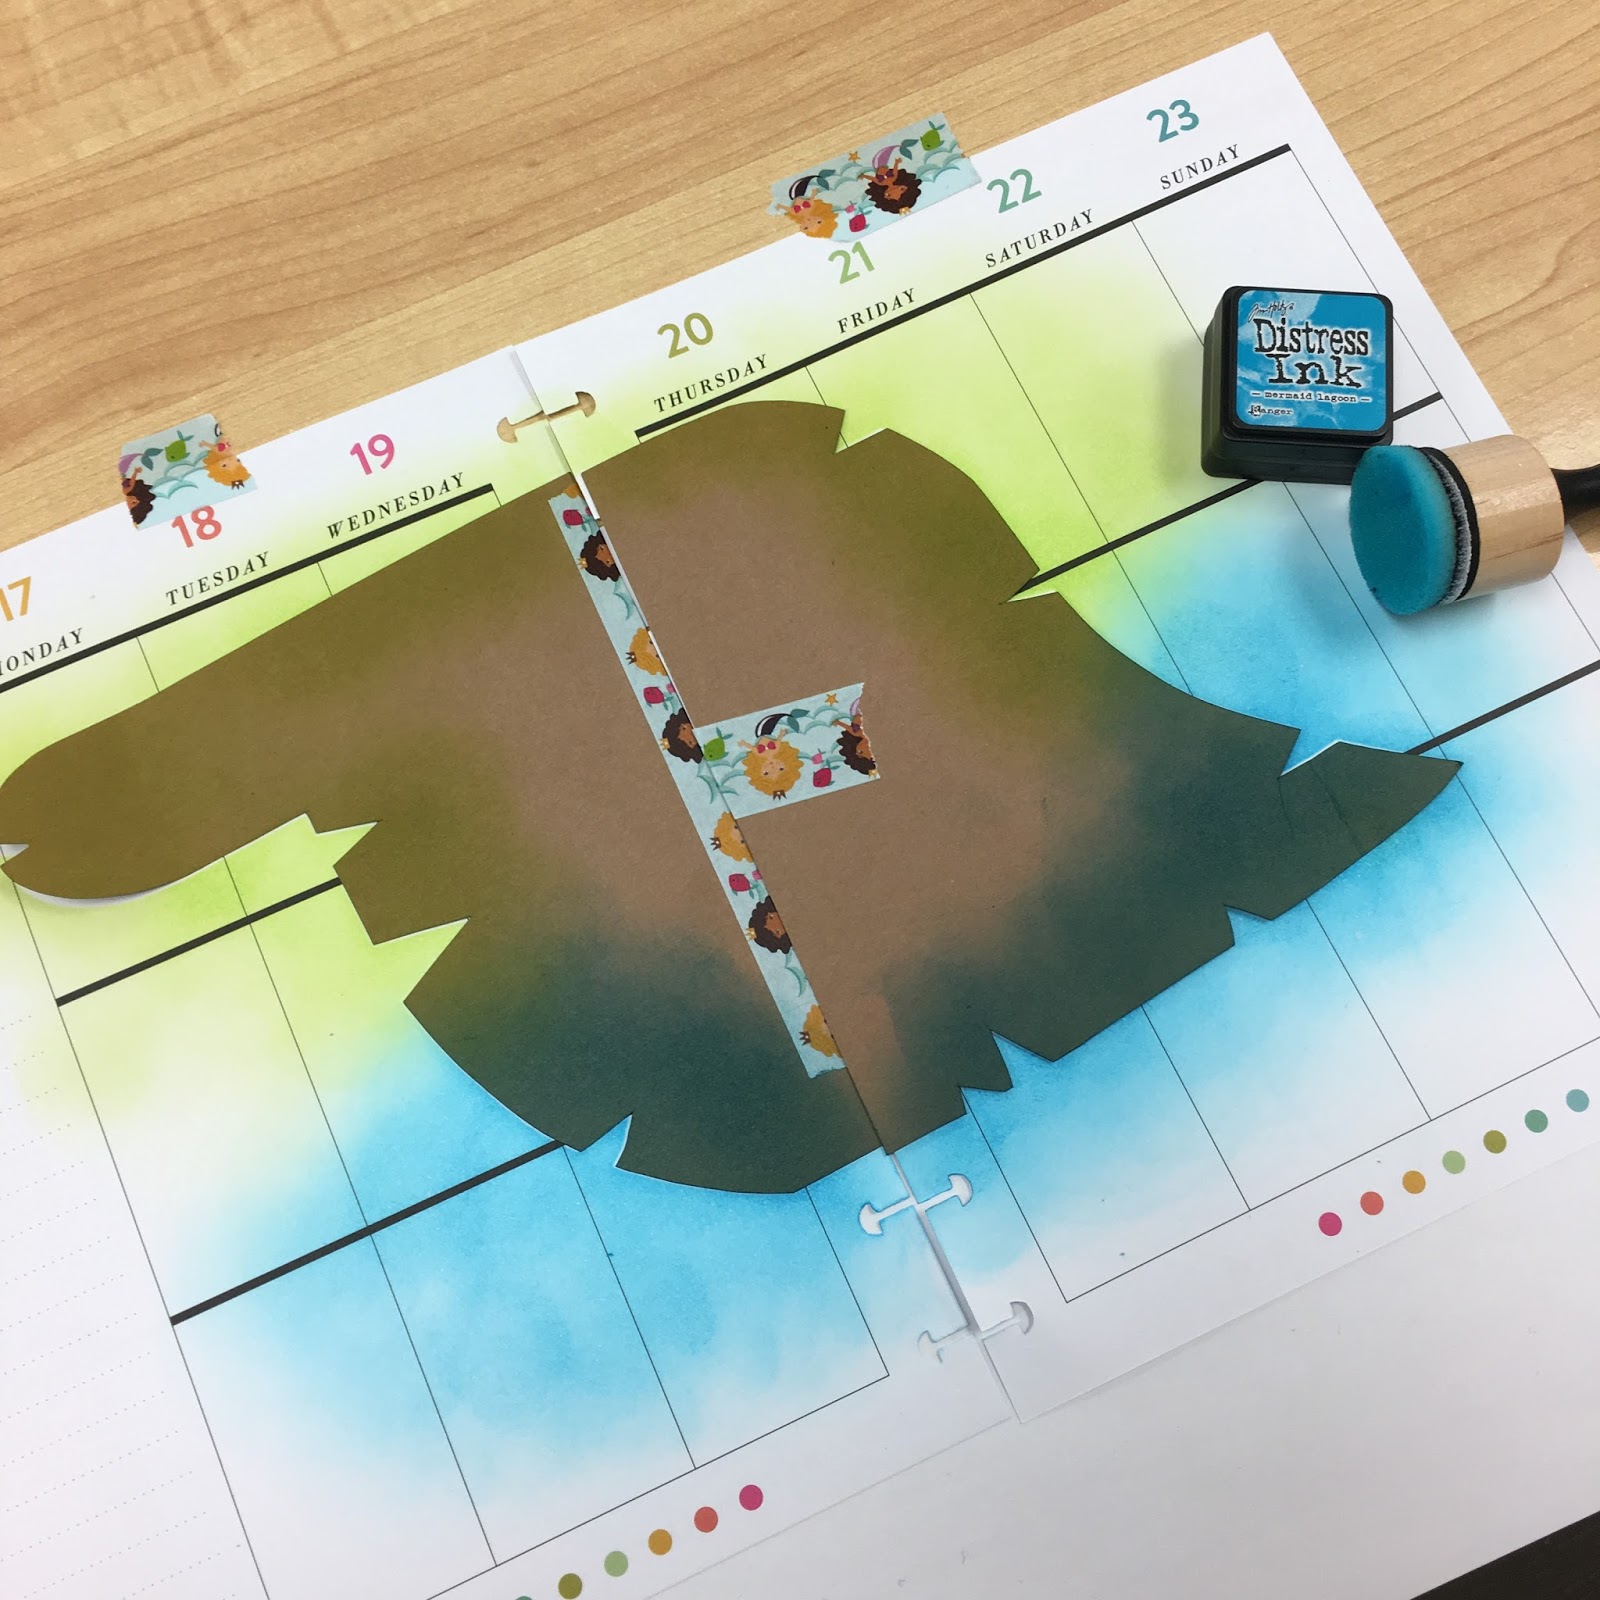
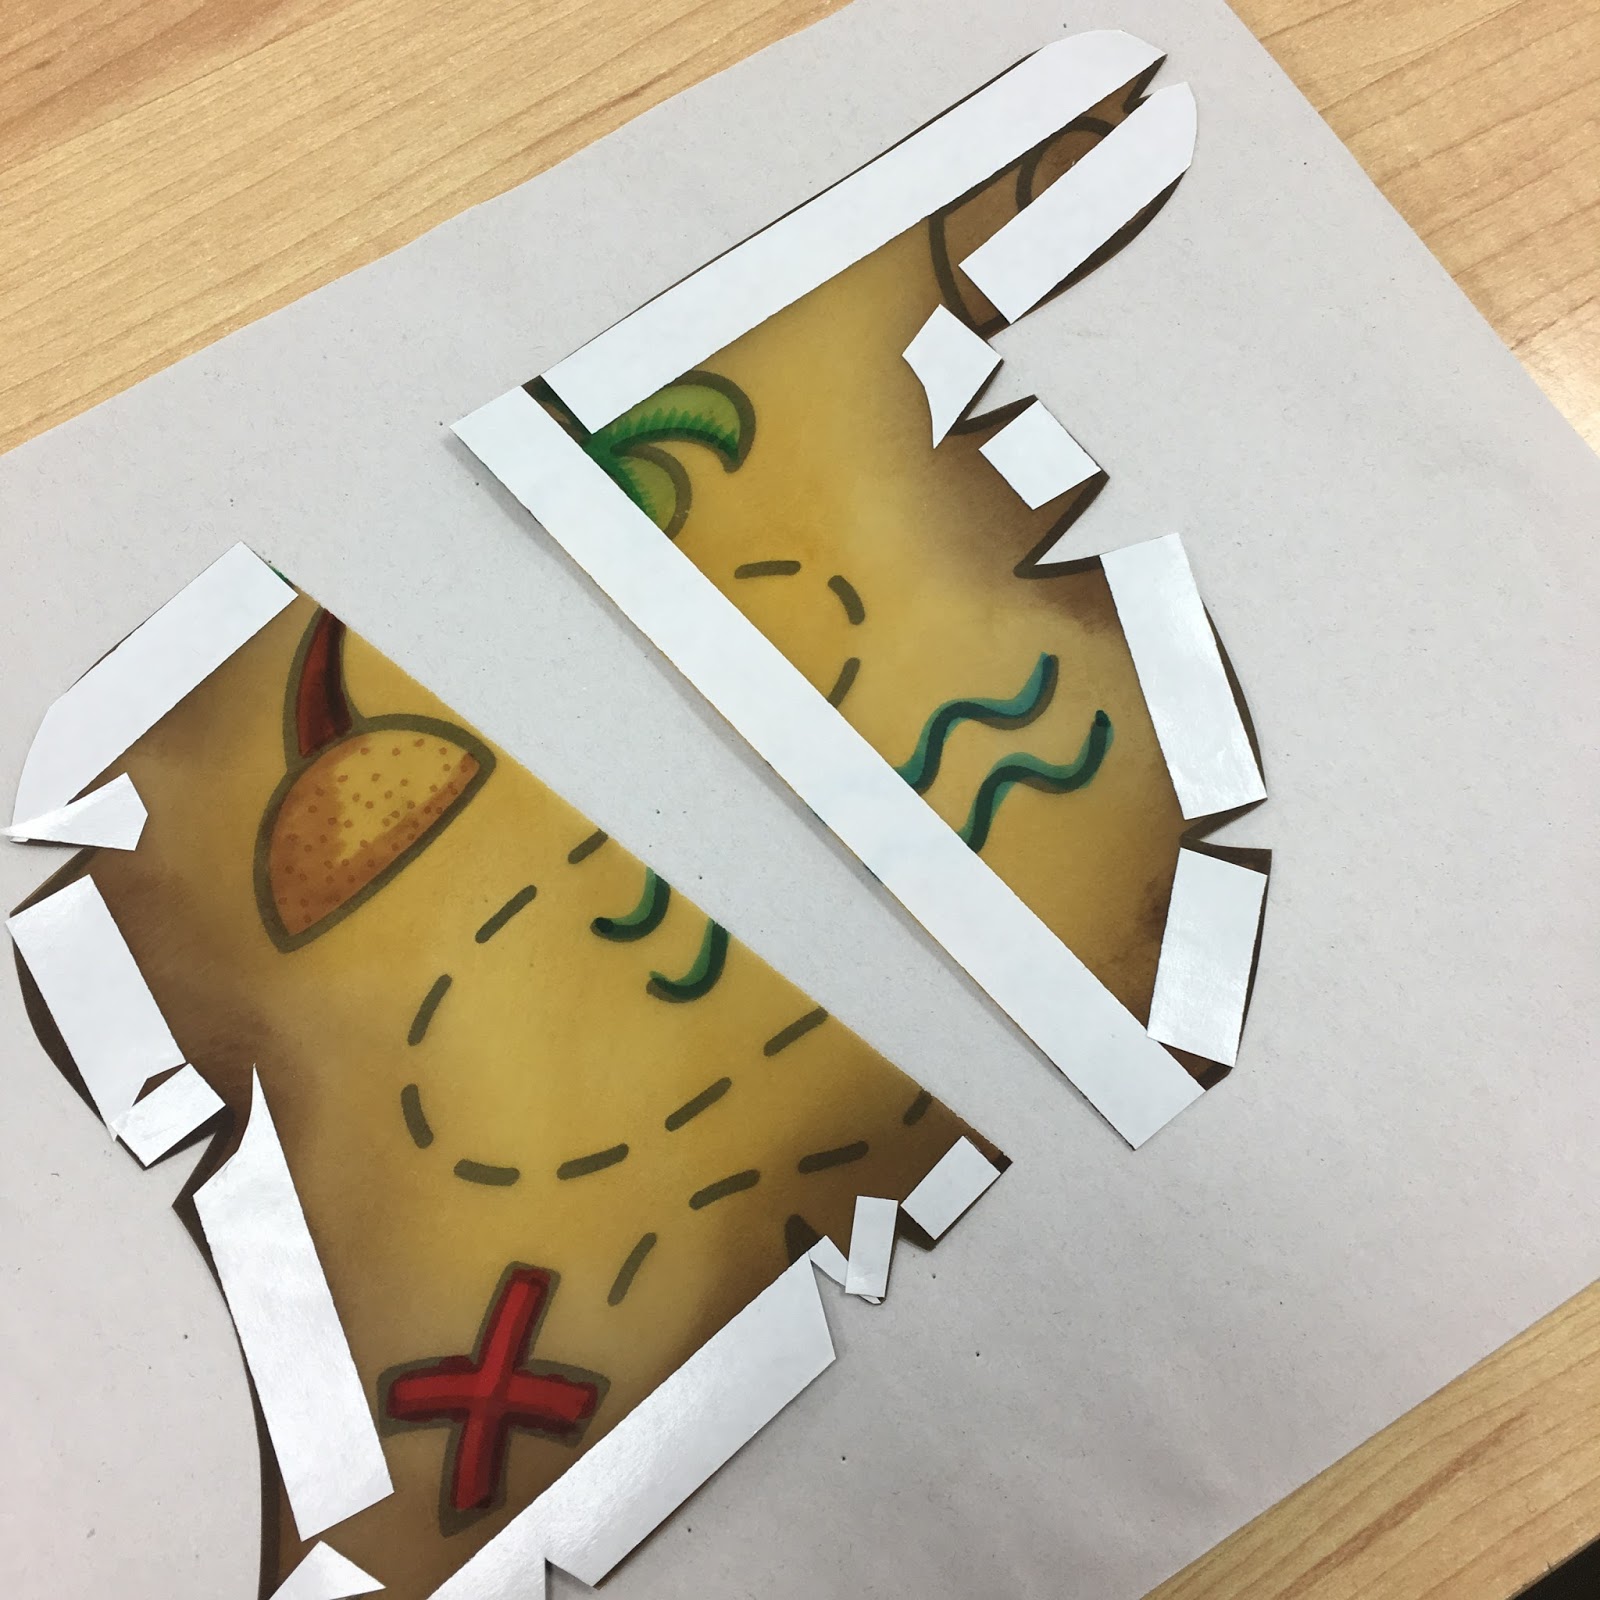
I used washi tape to hold it in place on my planner pages and inked around the stencil with Distress Inks to create the land, water, and beach.


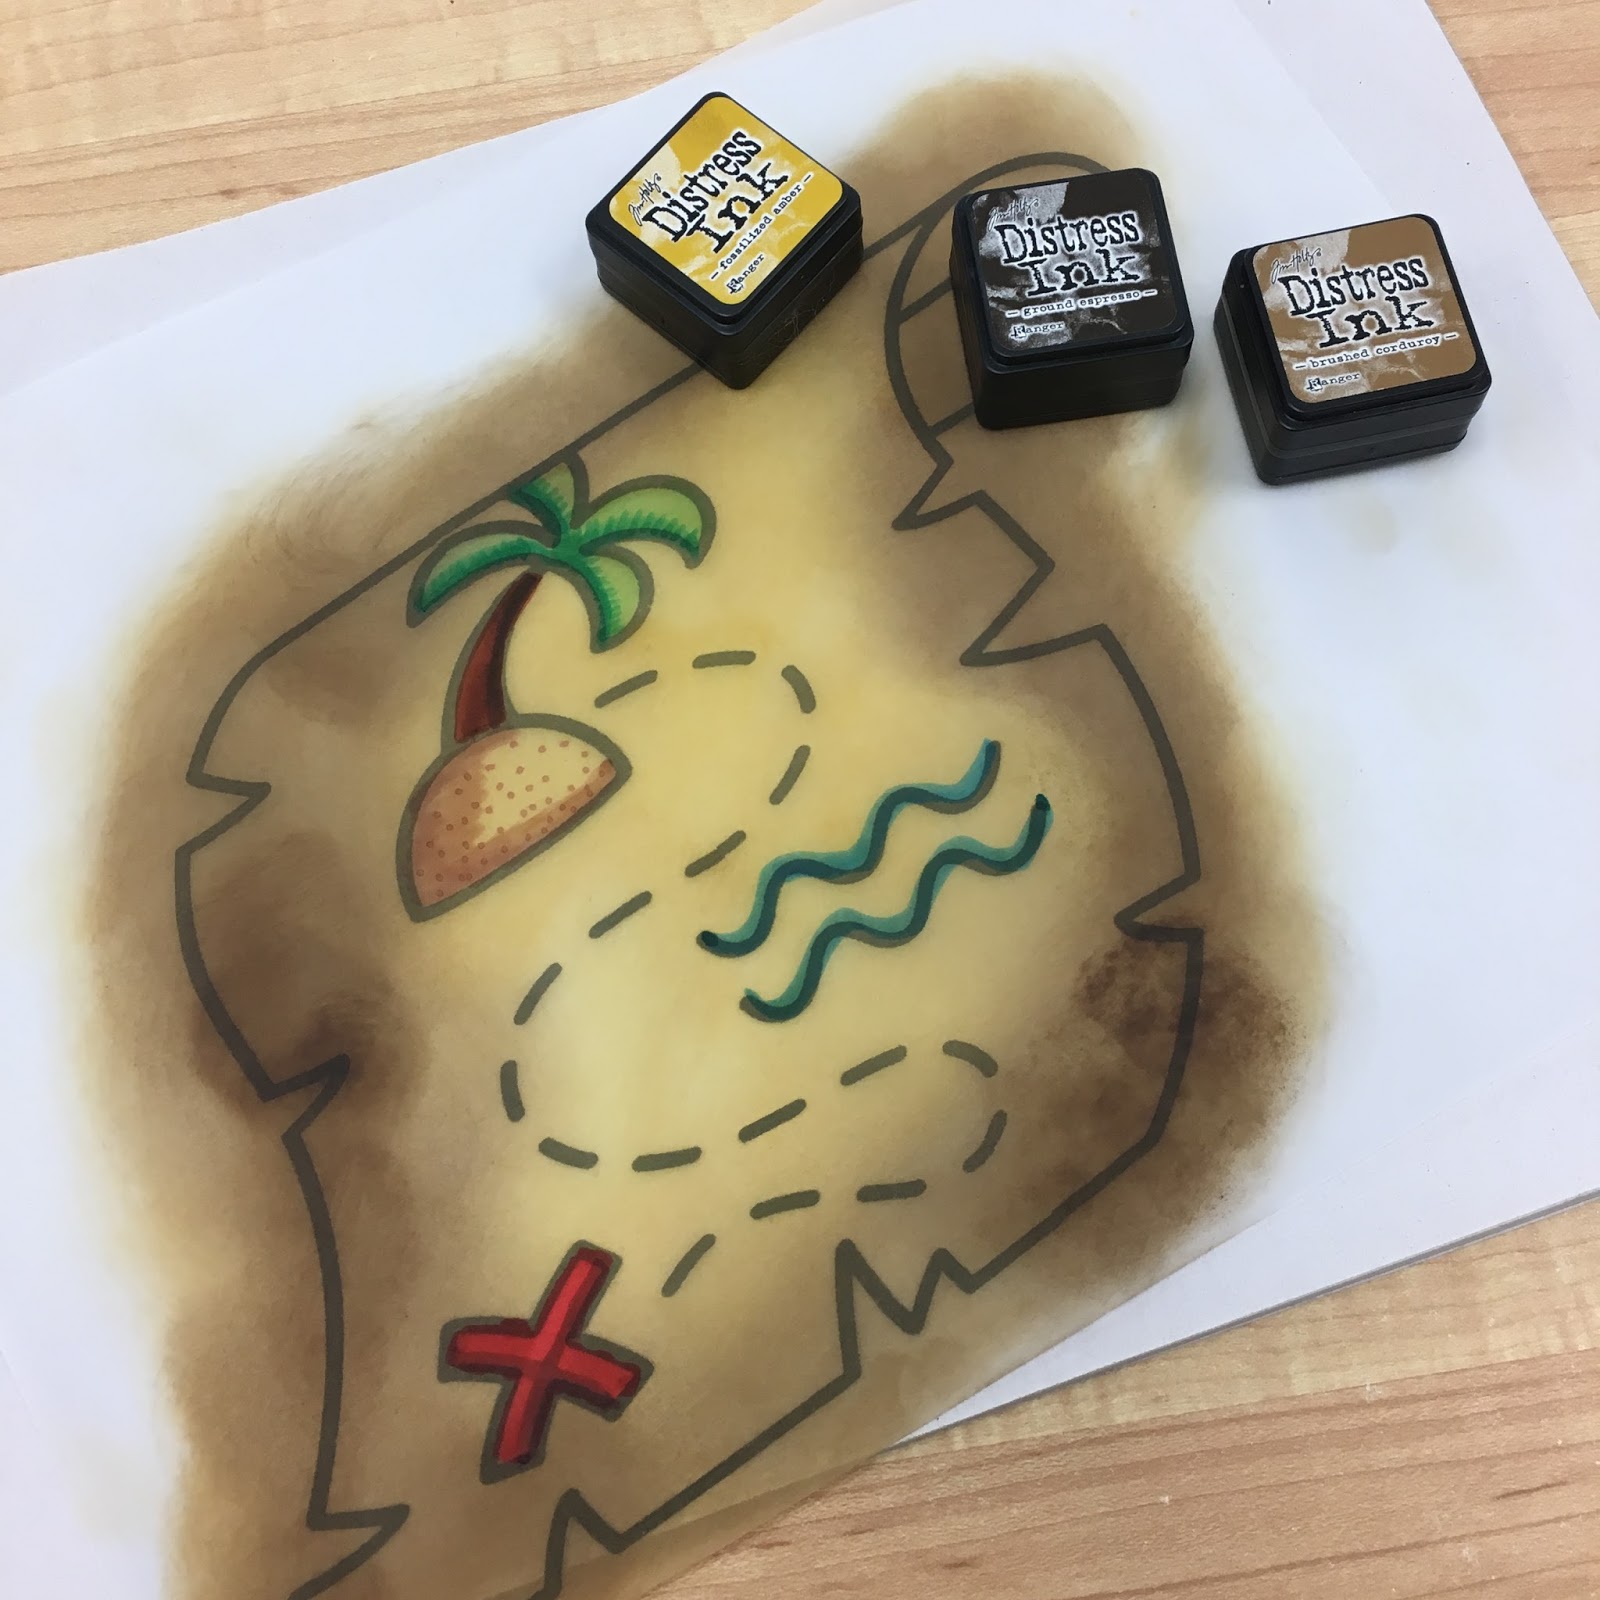
I then started to color the vellum map image. I flipped the vellum over and rubbed Distress Inks over it to get a worn paper look. I decided that I wanted a bit more definition to the palm tree, water, and "X". So, I used crayola markers to color those. I used crayola because that is what I had on hand at the time. Any water based markers would work as well.


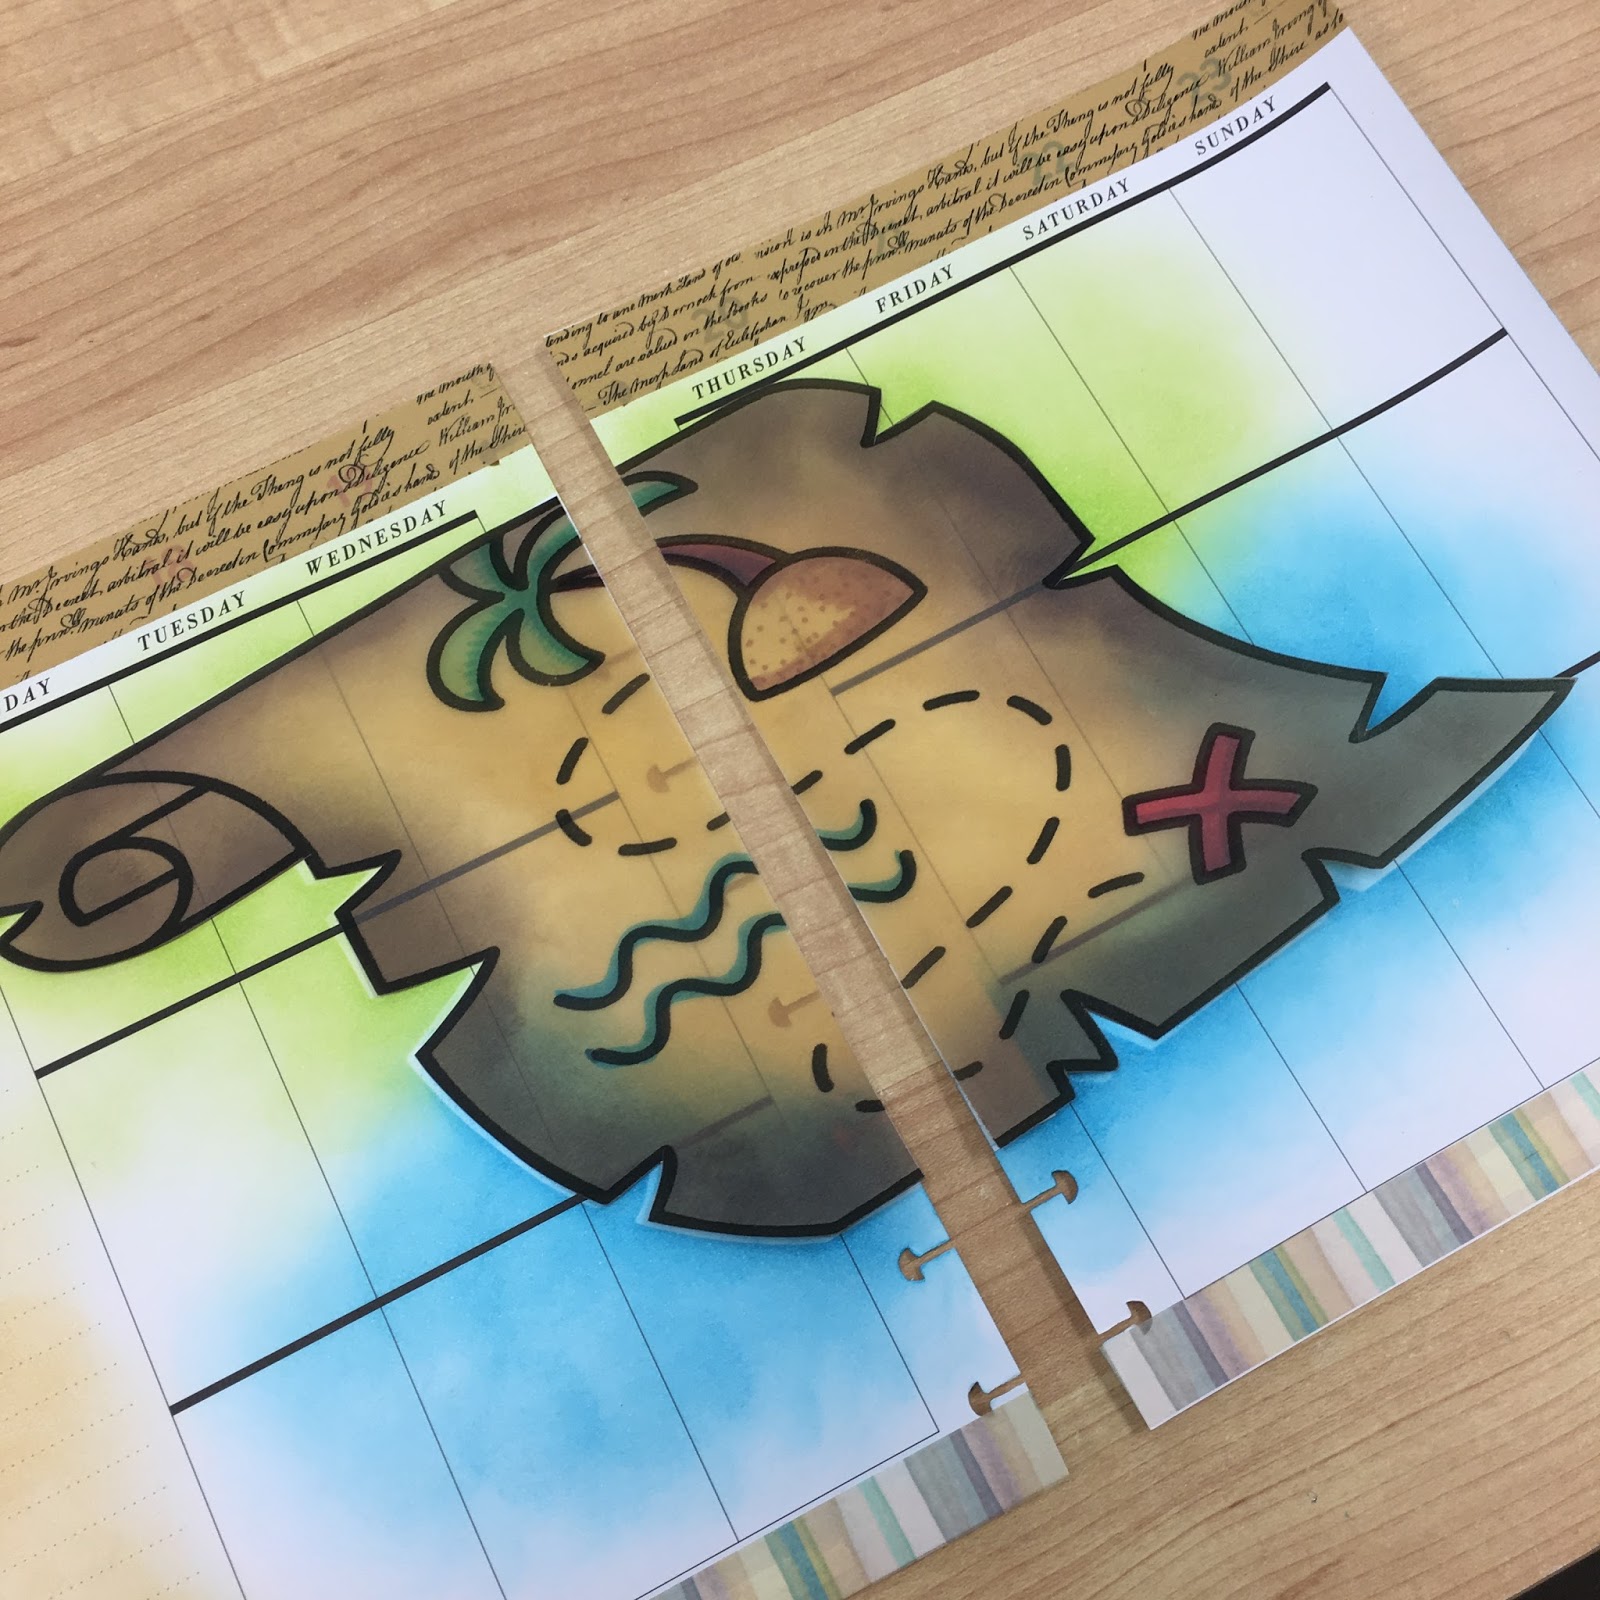
After coloring, I cut out the vellum map and then cut it in half to match up to the stenciled image. I adhered the vellum to the planner page with Scor-Tape. The Scor-Tape is invisible under the vellum. I then added the pirate images.

Recently I downloaded the Planner Basic bundle for all my functional planner needs. I use an insane number of appointment boxes, so this set is really exciting for me. But as I like to theme everything, I needed them to have an aged appearance. I don't typically dislike my handwriting. But as I am not good at Old English lettering, I inserted a text box into the planner boxes and typed out the headers that I use most often. Distress Inks to the rescue again! I rubbed a combination of Vintage Photo and Walnut Stain to age them.


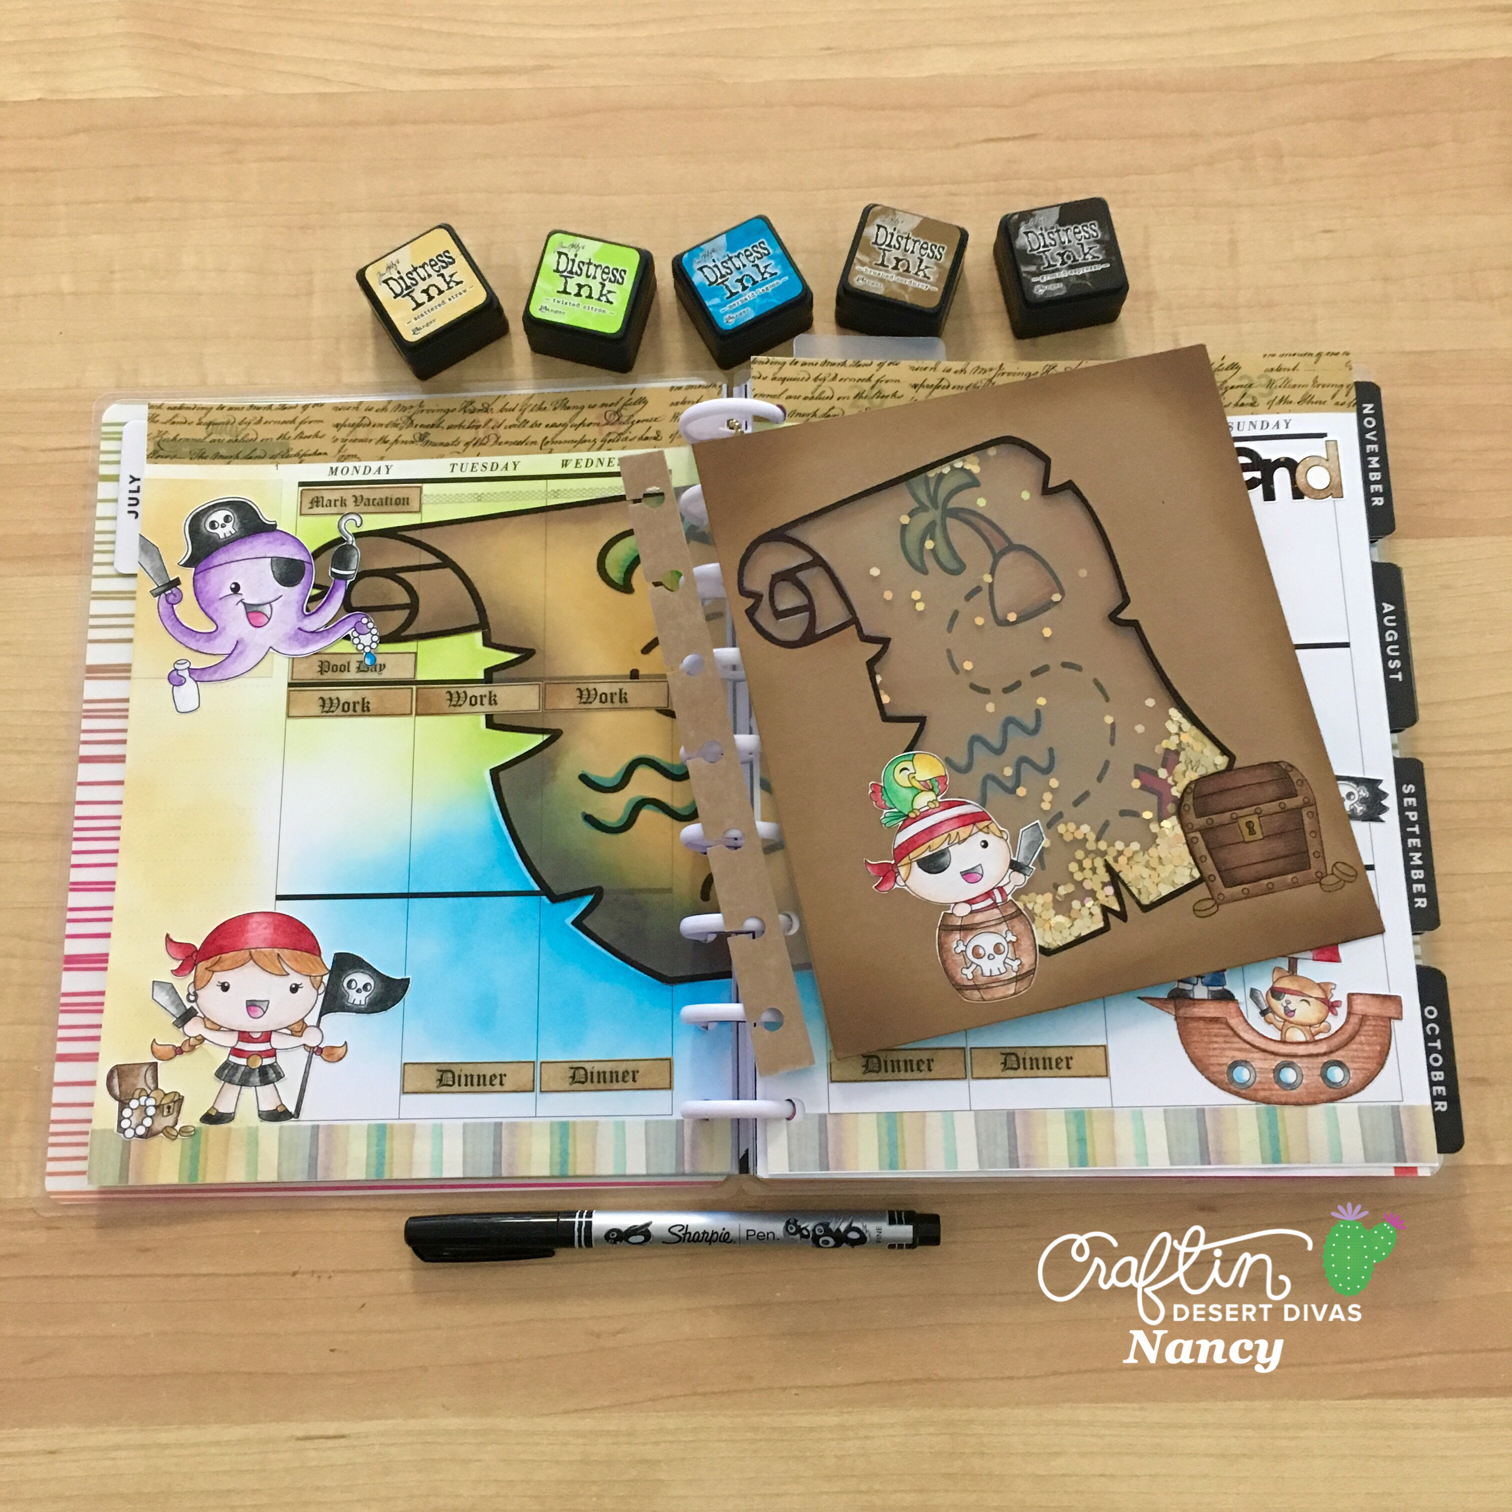
Bonus Project: In my current quest to not have any left-over images, I created a shaker dashboard. You may have noticed by now that I adore shakers. I love glitter. I can't help it! I had the little pirate boy in the barrel image left over and he inspired the dashboard. I thought it would be fun if he was the one who found all the gold. So, I printed out the treasure map image twice more on kraft colored cardstock. I then created the window for the shaker by cutting out the inside of the map image using an X-acto knife. I attached the acetate window to the cut out cardstock using Scor-Tape. Next, I used foam tape to pop up the map to give room for the gold glitter. I filled the window with glitter and closed the shaker, sealing around the outer edges with Scor-Tape. Then, I punched holes in the left edge to attach the dashboard to the planner discs.


Well, that's about all for today. I hope you enjoyed this project. I had a lot of fun making it. If you try this project, or were inspired by it, please reach out and let me know. I would love to see what you create. Until next time, come say hi in the Craftin' Desert Divas Gallery on Facebook or on my Instagram:


Products used:


Sunday, July 30, 2017

Get Well Wishes

Hello everyone.  Jan's here from handcraft hobby with you today on Craftin Desert Divas Blog.  I have a quick and simple card for you today using stamp set.

Here is what I made

I always love to color flower images.  After coloring so many cutie images from CDD, I revisited one of my old time favorite that is stamp set.


I began by stamping the wreath with peacock feather distress ink onto Canson Mixed Media papaer and then used peerless water colors as my coloring medium.  I love how vibrant they are.  I fussy cut the wreath out and began to stamp randomly the small flowers and leaves images and made my own background pattern.  I stamped with versamark ink and heat embossed with clear embossing powder.  And without fail *lol*, I cut my main panel with dies.


I cut the vellum with dies then embossed the sentiment from stamp set on velum with Verdigris embossing power.  I used gray copic marker to color behide the vellum to make the sentiment stand out abit.


I arranged the floral wreath and the sentiment banner onto the embossed background panel and dropped Nuvo Crystal Drop - to accent my card.  

I hope you like it and Thank you for stopping by today.

Hugs,
Jan

Here are CDD products that I used


Saturday, July 29, 2017

When Life Gives You Puddles...

Hi there, it's DT member Janni here.
Today I want to show you a card I made using Stormy Weather stamp set. That stamp set actually shows you how the weather is in Denmark this summer!


I started by coloring the cute little mouse with my Copic Markers, using mint green and yellow. For the sentiment, the little happy raining cloud, and puddle, I used the Rainbows & Sunshine stamp set. Those two sets are a perfect match!


For the background I used my all-time favorite dies, the Fancy Frame Dies. I used it for the two layers on top and my cutter for the last one? I added foam to the back of the mint green background, the happy cloud, and the mouse for more dimensions.

I wanted to give the card a rainy look, so I used my Glossy Accents in the bottom of the happy cloud, and in the little puddle, and again on the umbrella and on top of the mouse. I like that wet, rainy look from the Glossy Accents. For the last touch I added some yellow sequins from Carnie Sequins mix.


That's it for me today, I hope my card made you smile.
Have a lovely day!


CDD products used:


Friday, July 28, 2017

You're A Scream

Hello Friends Waleska here with a very fun and colorful card! The cute Monsters from the  set are so much fun and can be used for many occasions, can color them however you want...I love to use them in my cards!


CARD DETAILS:

I with a top folding card, I score a line in the center of the front panel to create another fold in the middle for a fun card design, I learned this fun design from the great Jennifer Mcguire. 


After that I die cut the Ferris Wheel die from gray cardstock, and for the rest of the elements I used red and aqua cardstock, I also used a brad so that the Ferris Wheel can move (how fun is that).  I then color the half front panel with yellow ink and for the back of the card I used a sun rays stencil with red ink.


I color my favorite monster from the 8 monsters that this stamp set has with markers in the same color combination of yellow red and aqua.  To embellish the card I added Nuvo drops in color
caribbean ocean and CDD Fall Harvest Sequins.  I stamp the fun sentiment inside the card for a surprise!


I hope you liked my card and be inspired to use different folds in your cards for a more fun effects!
Have a great day!


Products used:


Thursday, July 27, 2017

Peek A Boo

EK Gorman CDD BP 1.8jpg
cdd_logo_color_425px_1438310903_04267_1439400895__24025

Hey Divas! DT EK here today showing off CDD's . I have always adored this stamp set and all the different possibilities it presents. Today, I am featuring the little critters peaking out from inside the paper. This has always been one of my favorite paper piecing techniques, where you pop up paper on either side of the stamped images.

  EK Gorman CDD BP 1.3

To do this, I trimmed a sheet of blue Doodlebug paper (I used both sides of this sheet of paper today) to 1.25", 1" and two .5" panels.

  EK Gorman CDD BP 1.4

Using (hands down my favorite) adhesive, I added strips of to the bottom panel (kraft side) and added the blue stripe side on top.

  EK Gorman CDD BP 1.5

I measured where each panel would fall on either side of a 4.25"x5.5" piece of white card stock, going .25" further in so the panel would over lap the lines.

  EK Gorman CDD BP 1.6
I then stamped out the critters from the stamp set, plus the sentiment. Again I wasn't afraid to let the stamps over late the lines I drew, knowing, that the panels would cover them when added. I grabbed my copics and quickly colored in the critters, using some basic shading.

  EK Gorman CDD BP 1.7

 Using some dimensional , I added the panels onto of the card stock, allowing the cuties to peak out. I however, felt the card was missing something. If just felt a little flat to me. I experimented with adding another sentiment onto one of the kraft panel, but it still didn't feel correct.

  EK Gorman CDD BP 1.9

 In the end, I stamped out the sloth from the set, colored him, and fussy cut him out.

  EK Gorman CDD BP 1.2

 With , I added the Sloth onto of the left panel, so it looked like he was hanging onto the blue striped panel.

  EK Gorman CDD BP 1.1EK Gorman CDD BP 1.8jpg

But WAIT...
Son't go anywhere yet. I have a bonus card for you today. Did you know there are four cute hats in this stamp set...that's right FOUR different hats. I don't know why, but I have never used them, and as I was stamping, I kept thinking how cute a card would be using just the hats. So using the same technique, I stamped out a bunch of the hats onto some watercolor paper, and watercoloring the images in with some pearlescent watercolors. I may have run out of dimensional tape making the first card (and yes, I have already reordered more), so I added the metallic panels with just . Hope you enjoy the second card!

  EK Gorman CDD BP 2.1EK Gorman CDD BP 2.0 EK CDD blk watermark 2
CDD Products:
 
Peek A Boo Animals
Kraft_In_color_final__95691.1459447683.1280.1280
scor_tape_one_fourth_inch__41777-1440287079-190-285
xpress_tape_large_final__20654-1467560710-190-285
Newer Posts Older Posts Home