Thursday, May 31, 2018

NEW Monthly Digital Club

Introducing the DigiClub by Craftin’ Desert Divas.

The DigiClub is a new way to connect with other digital stampers, improve your coloring skills, and save each month on our exclusive digital stamps.

What’s included?

  • Monthly $14 coupon code
  • Digital stamping tutorials
  • Digital Inspiration
  • Coloring tips for digital stamping

Club details:

  • $7 monthly subscription
  • First month billed on the same day you sign up
  • Cancel anytime, no commitment
  • Subscriptions through PayPal
  • New codes emailed every 30 days
  • Code must be used on one transaction each month 

How to sign up:

  • Click the PayPal “subscribe” button below
  • Follow the prompts to complete the subscription
  • Your code will be emailed out within 24 hours
Sorry, DigiClub subscriptions are not eligible for any additional promos/discounts.


Join our digital stamping community today: 


Common questions:

What exactly is a "digi" stamp?
It's short for "digital stamp". These stamps are typically scaled larger than a physical stamp and can be printed at any size you prefer (usually 8.5” x 11” or smaller).

Why would I want a digital stamp instead of a physical stamp?
Besides cost savings, digital stamps can be merged together using photo-editing software and sized for your project. You can print out as many as you'd like (for personal use) and color them just like you would a regular stamped image!

What does resolution or “dpi” mean?
Our digi stamps are set at 300 dpi, which is a high resolution image. Anything under 300 dpi may not print well and may look fuzzy once printed. The higher the resolution on an image, the better quality it will be when printed. Typical resolution for screens (phones, tablets, monitors) is 72 dpi.

How "techy" do you need to be to use digital stamps?
You'd be surprised at how easy digital stamps are to use! All you need is a computer, a printer, some nice, white, smooth cardstock, and you're ready to go!

We can’t wait to see what you create! 

Monochrome Planner Pages With Cheryl


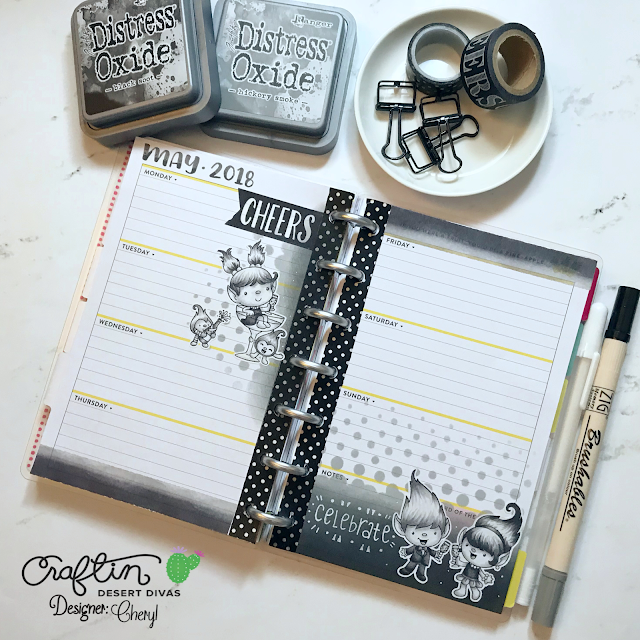
Hello Crafty Friends! This week's Craftin Desert Divas' Blog theme is Monochrome! I really love the look of monochrome layouts and sometimes it's nice to have a simple color palette! I did a black-tie event inspired layout using the

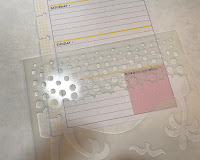
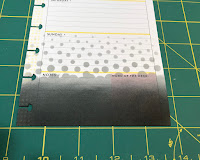
First I used the bottom of the beach scene stencil to create an Ombre bubble background. I started off with Hickory Smoke, then I used Black Soot. I added a little more Hickory Smoke to blend the two colors together.

I used the same stencil to do a sideways bubble background on the left planner page. 

Next I added some washi tape and some of the Celebration Trolls that I colored with alcohol markers!


I hope you enjoyed this planner layout! :) 
Products Used:


Wednesday, May 30, 2018

Monochromatic Cactus Card Tutorial with Waleska

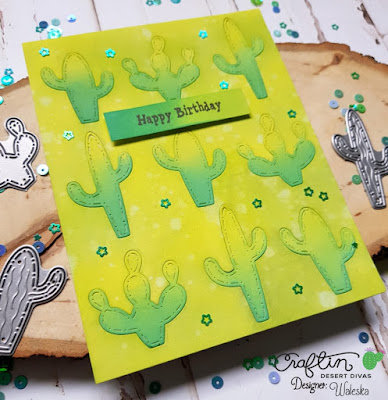
Hello CDD Fans, Waleska here to share my take on a monochromatic card, I love color so this was a great challenge for me, when I search a definition for monochromatic said:  The term Monochrome is usually taken to mean colors black and white, but may also be used to refer to other combinations containing only tones of a single color, so I took this meaning and named my card today gradient monochromatic.


CARD DETAILS:

I started by choosing the color I wanted to use as the base, I choose Twisted Citron oxide ink.  I ink blend the entire front panel of my card and die cut several of the cactus from the .  I added some water splashes to the die cut panel to give more interest to the piece without the die cut cactus.


I then colored the cactus starting at the bottom with Lucky Clover Oxide ink for a more defined  look to the cactus... and to stay true to the meaning of monochromatic I use green for them too.  I inlay all the cactus and glue them to the front panel.


I added some green sequin stars from the and added the sentiment on a gradient strip of cardstock and stamp the sentiment from the


I hope you like my take on this monochromatic style.  Have a wonderful day!


CDD Supplies:


Tuesday, May 29, 2018

Monochromatic With DT Susan

Hi, I am back on the blog featuring our technique of the week - use a monochromatic theme. I decided to use our Botanical Layers set along with three analogous shades of pigment ink.


Please excuse the following pictures. I had intended to post a video but when I looked at the footage - a whole section was missing!! In my defense this was the third video I had shot that day......ok no excuses.

First, using my Misti and the lightest of the colors I stamped the bottom image of the flower all over the light blue card stock to make a pattern. IT IS IMPORTANT TO HEAT SET BETWEEN LAYERS.


Next, again using my Misti, I stamped the second layer in the mid-tone ink.


A reminder to heat set between layers as we are using pigment inks which sit on the surface of the paper and are not absorbed very far into it.


Next using a regular acrylic block and the darkest ink, I chose the cluster of small dots to stamp the flower center.


In the set there is a filler stamp that is great for adding detail to blank spaces. I used the lightest ink for this step. 


For the sentiment I used Versafine Onyx Black and as I had assembled the card, I needed to use an acrylic block. This was obviously not the best of days in the craft room lol!!! The sentiments were from Wishful Thoughts.


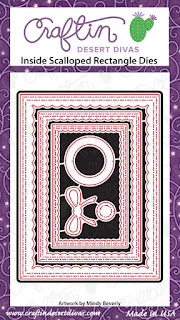
 I did die cut the panel with the Inside Scalloped Rectangle. I added foam dots to the outside part of the frame and mounted that onto the card stock. Then using a dry adhesive added in the flat center panel.


I hope you liked this card and the long winded tutorial! Thank you for visiting my blog.


Craftin Desert Divas Products:


Monday, May 28, 2018

Monochromatic With DT Marine

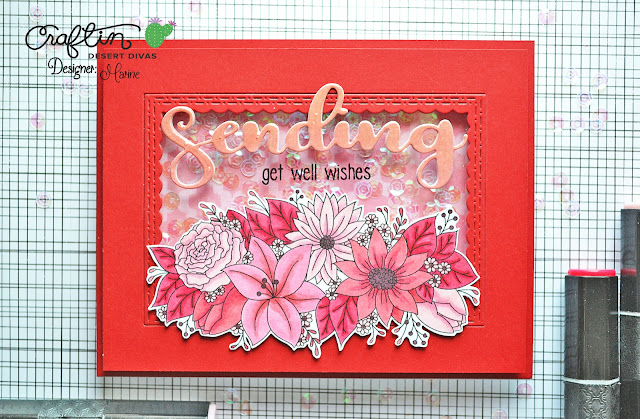
Hello crafty friends, it's Marine from Design Team! This week, we will share different projects using monochromatic colors. Here is mine, a shaker card, in coral/red tones.


I first started by stamping the flowers on white cardstock, next I colored them using my alcohol markers, and fussy cut them. I cut two rectangles from red cardstock, one slightly smaller than the other. From this smaller rectangle, I die cut an inside scalloped frame that I kept attached by taping it at the back. And at the back of that smaller rectangle, I attached a piece of clear acetate to create the shaker window.

At the back of that window panel, I put four layers of double sided around the opening to create dimension for my sequins. Once the sequins were in the window, I closed it using a piece of pattern paper. And next I attached that shaker panel to the large red rectangle previously cut.


I attached the flowers at the bottom of the window using double sided tape. Die cut the word Sending, attached it on the window and stamped the second part of the sentiment directly on the acetate using stazon black ink (perfect to stamp on acetate or vellum)

* *

To finish the project, I attached the window panel to a red card base, and applied glossy accents to the word Sending to add some shine.

I hope you liked this card, see you soon on the blog! :D


CDD SUPPLIES

-

-

-

-

-

Sunday, May 27, 2018

Mermaid Ombre Tutorial With DT Janni

Hi Craft Friends, DT Janni here.

Today I want to show you how to make ombre effects with Distress Oxide.

I went a little crazy and made 3 cards and 1 tag.


I really do love working with Distress Oxide, so that's what I used to make ombre effect on my backgrounds. Normally I'm not that crazy about blue - but I think it came out pretty cool.

The colors I chose are 'Salty Ocean' and 'Blueprint Sketch' - and since 'Tumbled Glass' is not made in Oxide yet, I used the normal ink for that color.


Let's get started....the first color I used is 'Salty Ocean.


Then the darkest 'Blueprint Sketch'.


Last color 'Tumbled Glass'.


After using all the colors it's time for some more blending, making sure the colors blend in perfect. 


I sprayed water on the Oxide and dried it of - it's an amazing effect, and I love the ombre effect on this one.


I ended up making 3 backgrounds, such a pretty sight.


I made my own little stencil using 'Inside Scalloped Circle Dies' and 'Outdoor Landscape 2 Dies'. Then I taped it to my background and used the same blending technique and colors.


I found the frames I wanted to use 'Fancy Frame Dies' and 'Shaker Tag Dies', and ran them through my Big Shot.


I colored up all the cuties from 'Mermaid Trolls' - one of my favorites from our May Release.


Here you see all the pretty embellishments I used.


For the tag I used the little purple mermaid and a sentiment from 'Treasure Trolls', purple Nuvo and sequins.


Is she cute or what! For this one I used the sentiment from the set on a big banner and some, pink and white Nuvo, and shimmer sequins.


Another cutie and for this one I also used a sentiment from 'Treasure Trolls' and some pink and white Nuvo and shimmer sequins.


The little cute merman got a sentiment from 'Whale Cake Digital Stamp' on a big banner. For embellishments I used blue sequins and white Nuvo.


That's all from me today - I hope you enjoyed my post.

See you soon again!

Hugs,
Janni

Products used:


Newer Posts Older Posts Home