
Welcome, everyone! Lisa from In The Crafting Cave sharing a crafty tip with you today. Sometimes we are in a hurry and we just don't have time to decorate the inside of our cards, right? Well, no worries, I have a quick and easy solution to that problem and no extra paper needed for this one.
But first I'm going to share my project with you. Remember, everything is about being in a hurry today. So I kept this card simple.
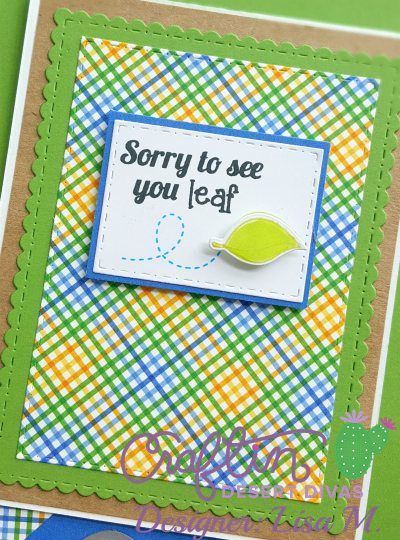
Here's what I made for you.
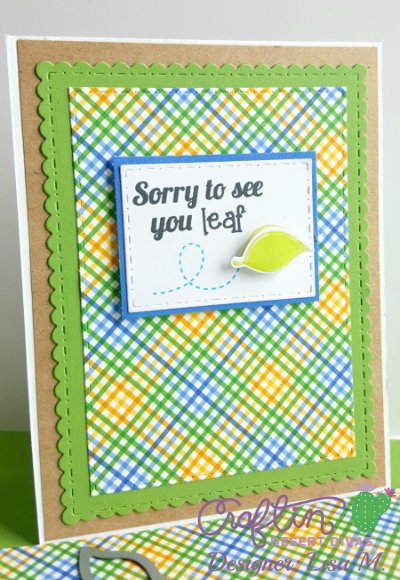 Layering kraft and green cardstock with -cut papers from the
with this simple image and sentiment from
the makes everything simple.

Now for the inside of the card base. I always do this first and I will tell you why shortly.
You have your card base cut (4.25" x 5.5") and the fold scored, laying the card base flat on your scoreboard you want to score all the way around the card base.

You can see here I scored twice and did a cross pattern at the corners.
You don't have to do that you can stop short and square the corners.
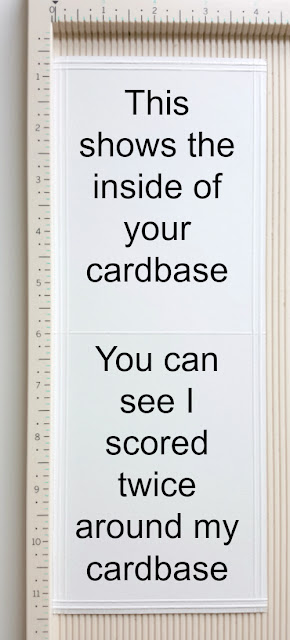
Be sure to fold so that the embossed scores are inside the card base.
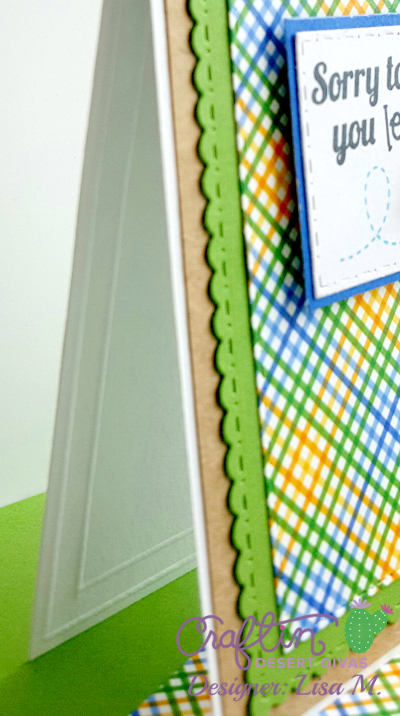
This is why I do this first, see those beautiful straight lines you have now.
Lining your cardstock on the front of your card is super easy now and it will cover
the lines.

But first I'm going to share my project with you. Remember, everything is about being in a hurry today. So I kept this card simple.
Here's what I made for you.
with this simple image and sentiment from
the makes everything simple.
Now for the inside of the card base. I always do this first and I will tell you why shortly.
You have your card base cut (4.25" x 5.5") and the fold scored, laying the card base flat on your scoreboard you want to score all the way around the card base.
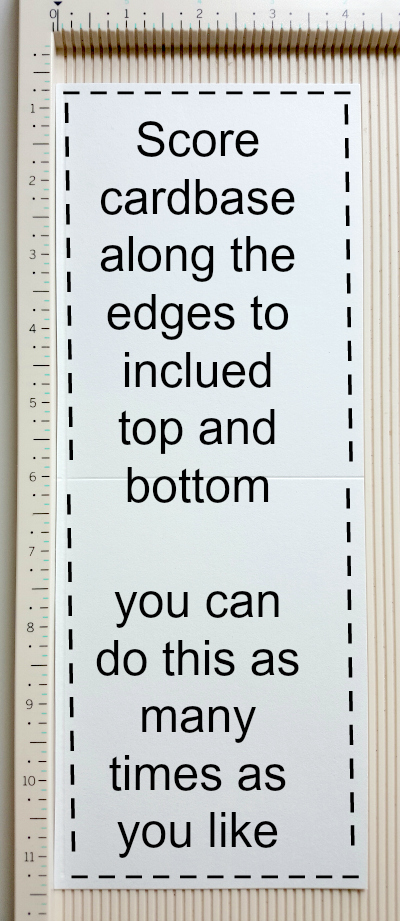
You can see here I scored twice and did a cross pattern at the corners.
You don't have to do that you can stop short and square the corners.
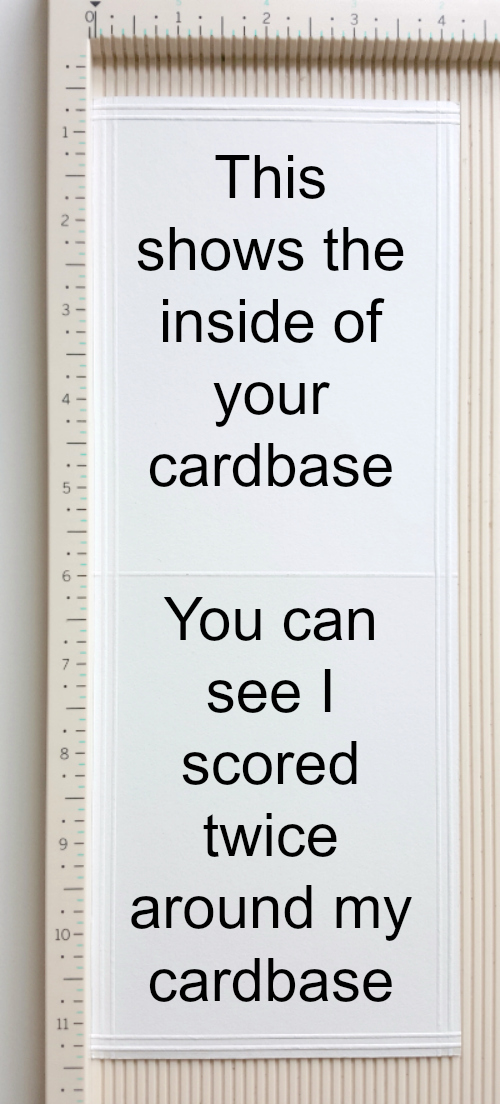
Be sure to fold so that the embossed scores are inside the card base.
This is why I do this first, see those beautiful straight lines you have now.
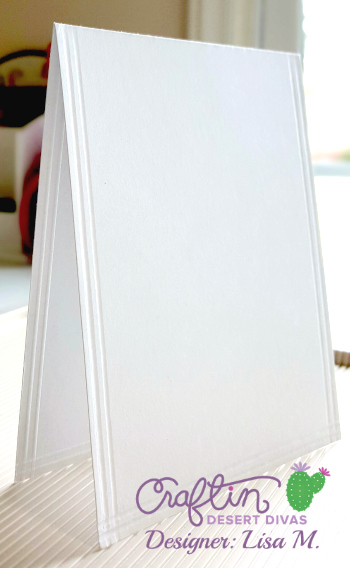
Lining your cardstock on the front of your card is super easy now and it will cover
the lines.
Here's the products I've used.

| Must have. |

As always, thanks for stopping by and I hope you join us again!

Pretty card!!
ReplyGreat tip! Thanks so much for sharing.
ReplyVery cool! What a quick simple thing to do and such big impact! Love it and love the card...
Reply