
Hi Divas!
Toni here with you today to continue our discussion this week about ways to fix those pesky little mistakes we all make periodically, or in my case, with about every card. LOL!
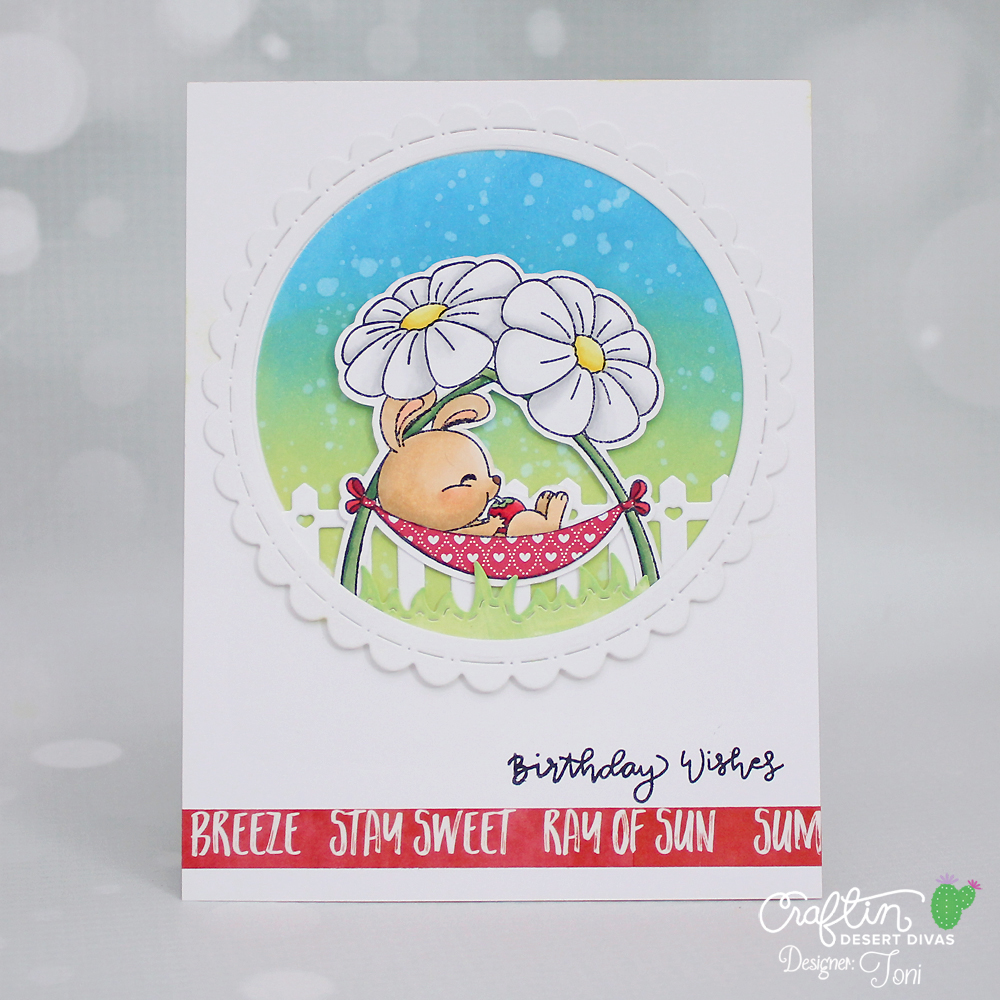
This past Monday I posted a card for the current June Moodboard challenge which allowed me a few ways to show you how I fix oops. (You can see the finished card at the bottom of this post as well.)
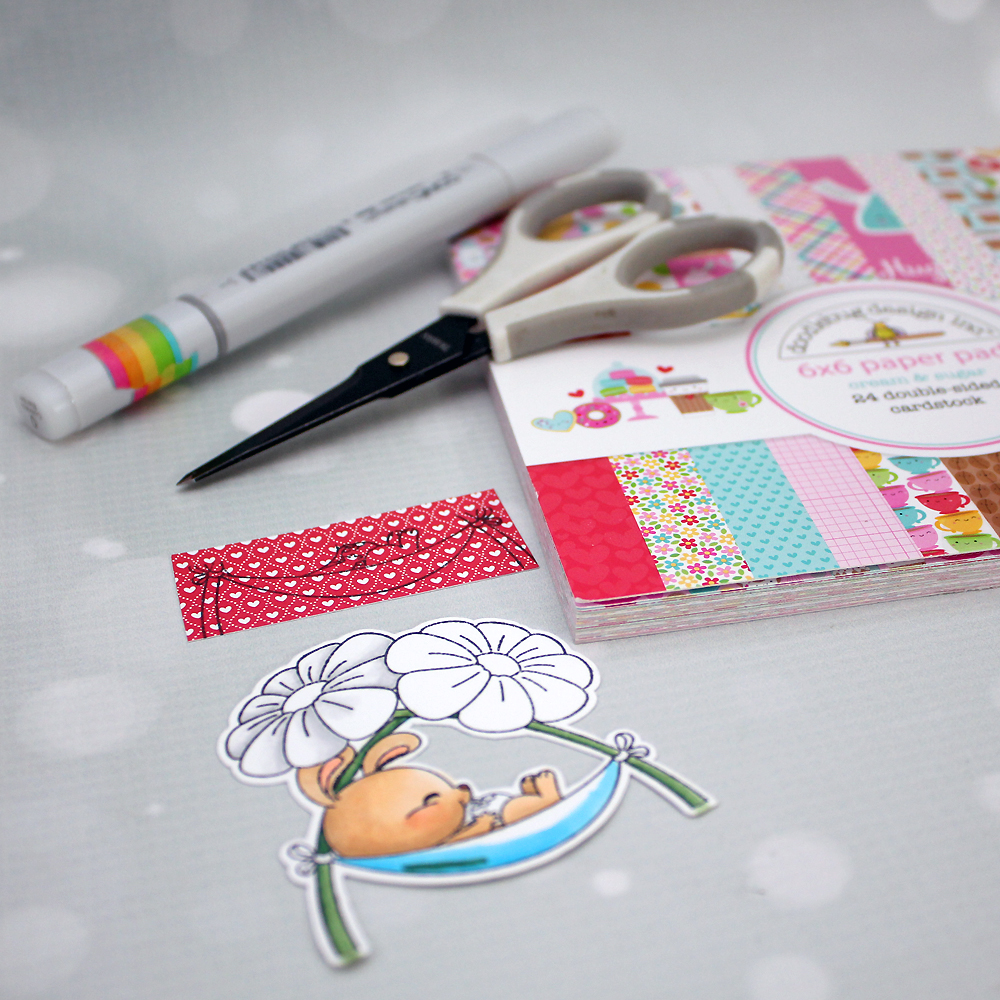
In this case, I used a Copic 0 (I ALWAYS have that on hand when I'm coloring) as well as designer paper () and my craft . Isn't the image from CDD adorable?

My most common mistake is to color outside the lines with my Copics. Can you see the boo boo where the flower stems cross on top? And a tiny one on the hammock tie on the right side? I immediately applied Copic 0 to those with great results as seen in the below pic.
You do need to be careful not to apply too much Copic 0 or you could affect the color within the lines. Trust me. I so know. Just apply a little and let it dry before trying again if necessary. The worst color I've found for fixing is red and the best is gray.

Now my other mistake with this card was to grab the wrong color when I was working on the hammock. As you can clearly see, I grabbed the green from the stem rather than the darker blue I intended. (insert primal scream)
I can assure you that no amount of Copic 0 was going to fix this so I decided to paper-piece the hammock. I just stamped the hammock on the then cut it out and glued it over my boo boo using .
Super easy and what a cute way to bring in more color and design without having to color it myself. Looking at the finished card, you'd never know there were so many bumps along the way!


1 comment:
I appreciate you taking the time to visit my blog and leaving a comment. Have a crafty day!!