
This week, we're showcasing all-occasion cards that would be sure to send a smile to anyone! Whether we live far from our friends and family or simply want to let someone know we're thinking of them, handmade cards are still a fun way to a "Happy Mail" day!
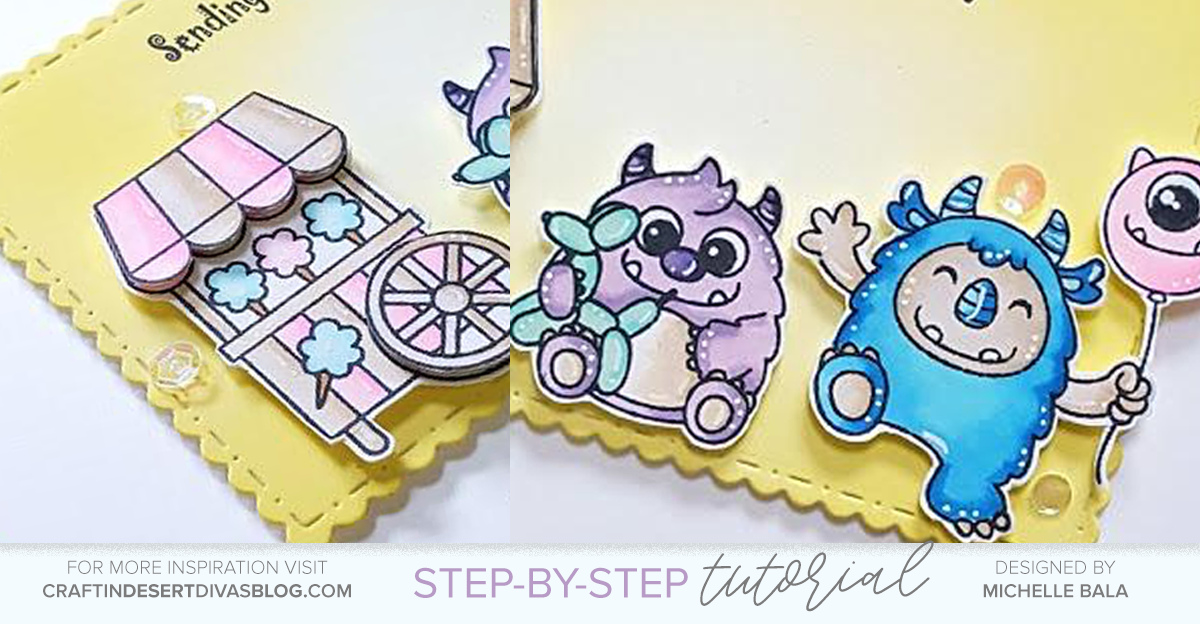
In today's neverending stream of push notifications, texting and geo-tagging, nothing beats getting an envelope in your mailbox hand-addressed to you. Handmade cards can brighten up anyone's day no matter how far apart you are. Michelle's on the blog today showing you how to create a fun Monster card and sharing her sweet-as-candy Copic color combos.
----

Here are the steps I used to create this card:
Ink up some cardstock and die cut the panel. I used Squeezed Lemon Distress Oxide Ink and .
Select your images, then stamp, color and fussy cut around the edges. I've left a slight border around the edge.
Monster Copic Marker Color Combo:
BV00, BV11, BV17, BG10, BG15, E41
Cart Copic Marker Color Combo:
B00, B01, RV00, RV02, E41, E42
After you've trimmed your stamps, stamp your sentiment on a panel. Arrange and adhere your colored images however you'd like.
DESIGN TIP:
When arranging your finished colored images, use a design sketch or simply "ground" your images using one of the sides. Try peeking some cute animals out or setting them on the base of the card like Michelle's done on her card.
Stamp your image twice and adhere the second image to the original using adhesive foam dots to achieve added dimension. You can see how I did this on the canopy and wheel above.
Embellish with sequins! Aren't these monsters too sweet?
Finally, adhere your panel to your card base, slip into a fun envelope and you're ready to mail. Thanks for visiting today!
----
Be sure to check out more Design Team inspiration this week on in the and on right here on the Blog.
1 comment:
I appreciate you taking the time to visit my blog and leaving a comment. Have a crafty day!!