

Today on the blog, Tatiana will be sharing one of the newest Craftin Desert Divas Sets, Fruity Friends, four different ways! This new monthly series will show you how to take one of our sets and stretch it for more than one occasion or style.
--------

I'm so thrilled to be on the Craftin Desert Divas blog today with a special post featuring brand new and sooooooo adorable stamp set from the Craftin Desert Divas new July Release!!!
This is a jam-packed post filled with lots of pictures so let's start with the first card colored with Copic markers.

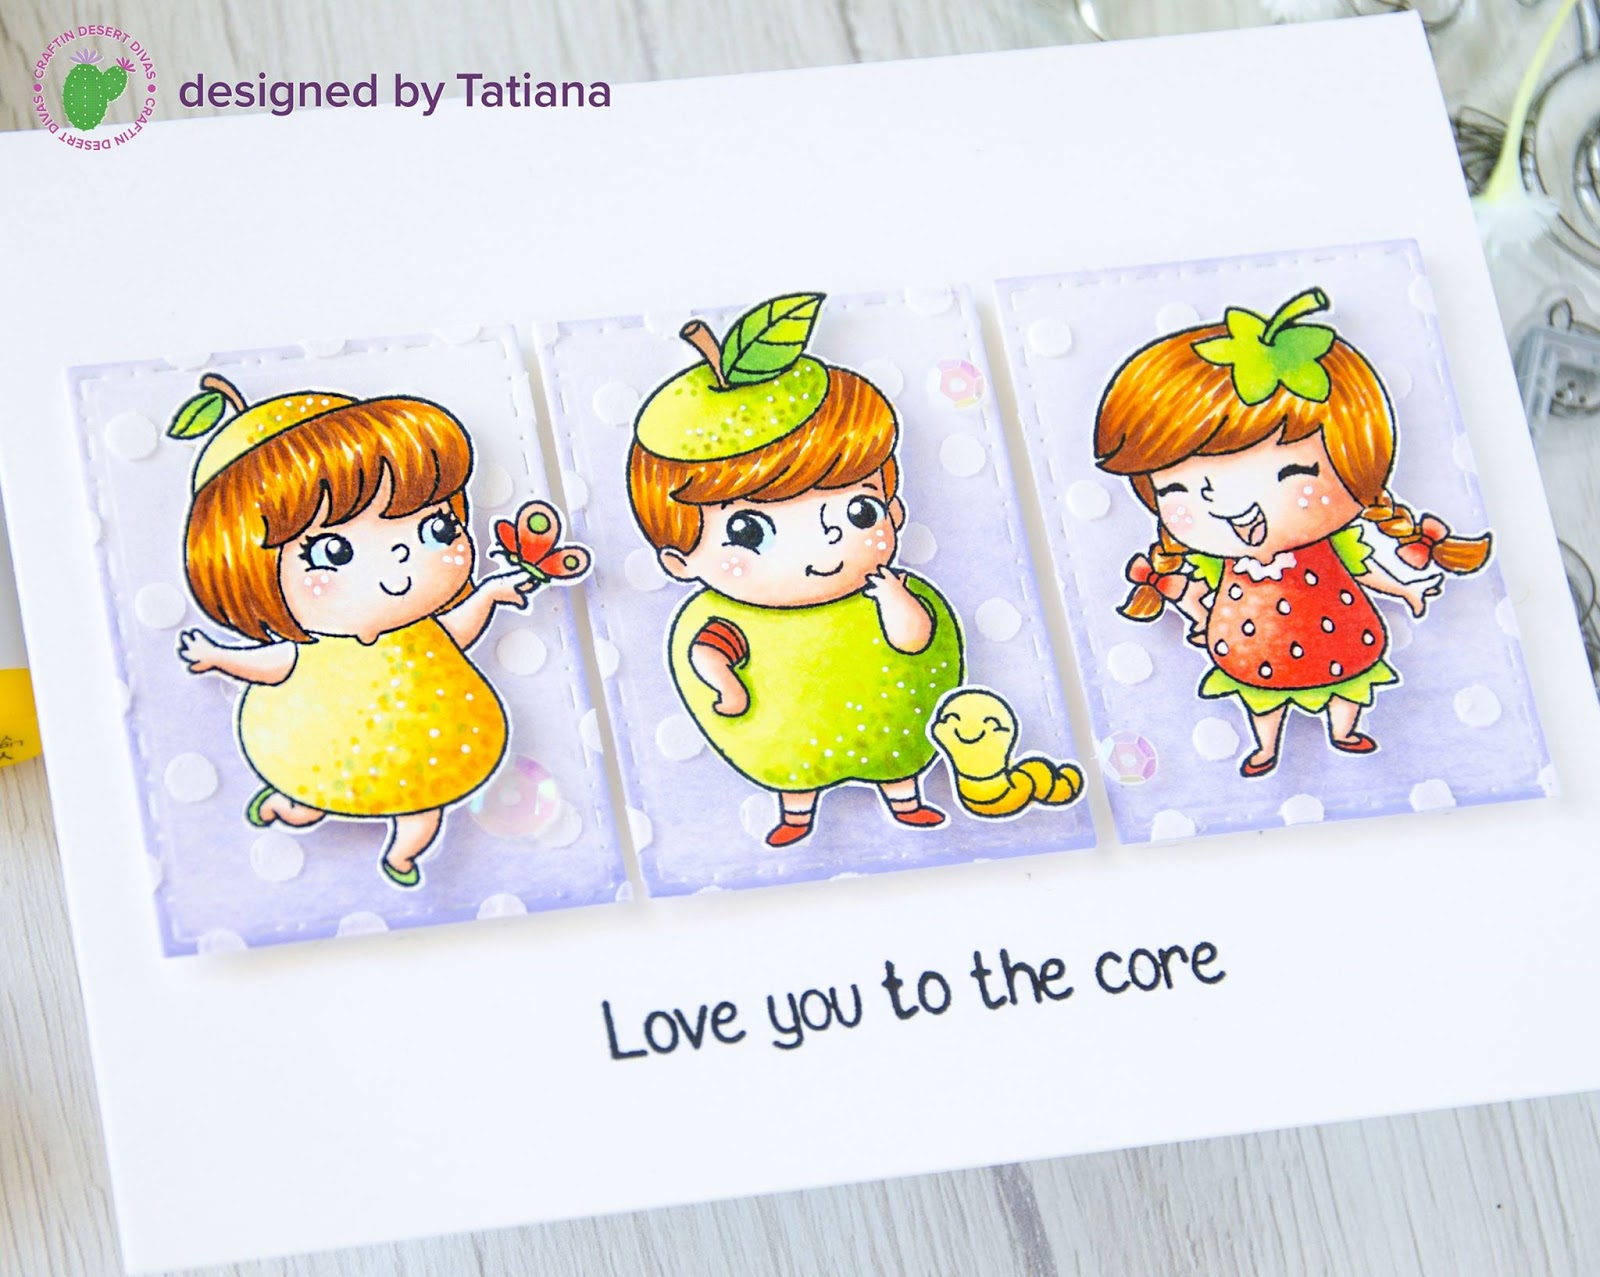
Card #1
I chose some cute fruity characters from set and stamped them with a . Next, I proceeded with coloring and finally fussy cut everything with , leaving a little white edge around.

The complete list of Copic markers used on Card #1:
Skin E0000-E01-E02-E11-R20; YG00-YG01-YG13-YG25-YG95; R02-R05;
Hair Y21-YR24-YR29-E39; Y11-Y15-Y17-YR24; E33; BG00.

Working on the layout, I die-cut three stitched frames from , added a soft coat of Distress Oxide ink and a fun dotted pattern through Sorted Shapes Stencil with a plain .

Next, we have a soft watercolor scene.
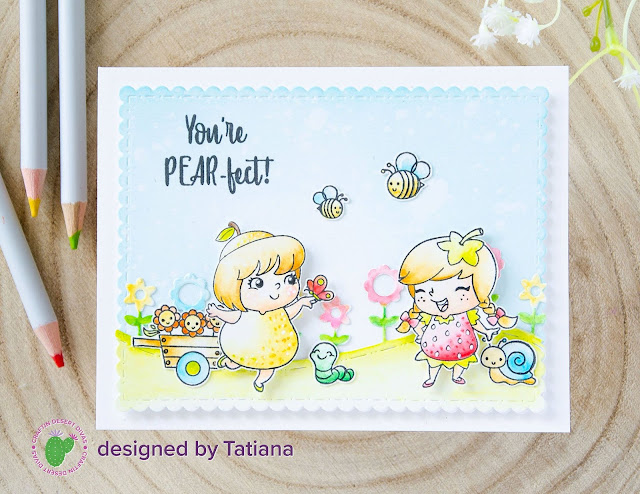
I switched to a Bristol paper and stamped a few adorable girls from along with some small images from stamp sets with a .
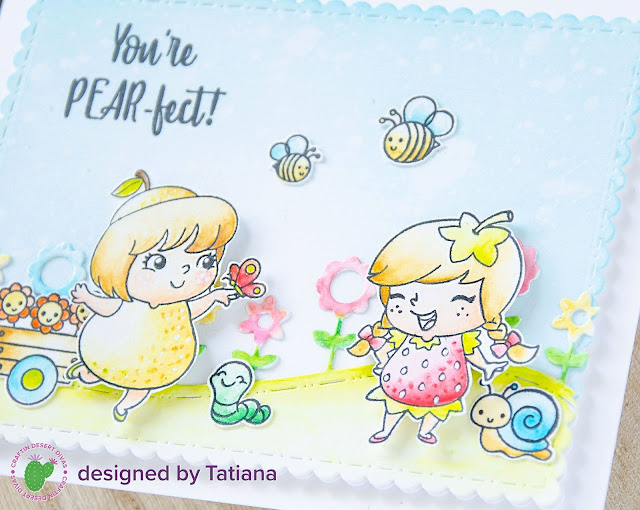
Before coloring, I also prepared some die cuts for the background using the same Bristol paper, and .


Card #2
Next, we have a soft watercolor scene.

I switched to a Bristol paper and stamped a few adorable girls from along with some small images from stamp sets with a .


Finally, I could enjoy watercoloring the whole card with watercolor pencils from Prima. "The Basics" 12 piece set was more than enough for this card since you can stretch any color and create a variety of shades by adding less or more water.


Card #3
My third example is this colorful and bright shaker card.
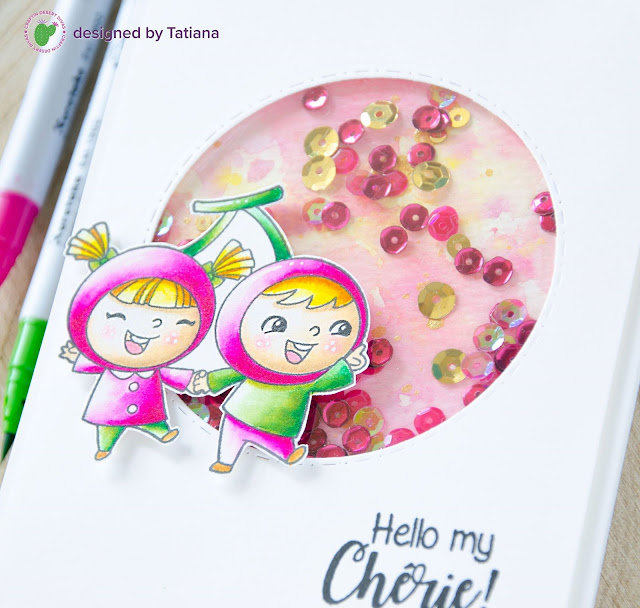
Again, I started with a Bristol paper and a . The Zig Clean Colour Real Brush markers gave a totally different look to this card since they have incredible, juicy colors.

Assembling the shaker part, I prepared a watercolor background and filled the circle window with mix.

 I stamped a whole bunch of images on a watercolor paper, took my regular watercolors and tried to make a non-perfect (even a bit splotchy) watercolor look.
 I hope this post inspired you to stretch your craft supplies and get more use of the same stamp set. There are so many ways to use these sweet images!

Again, I started with a Bristol paper and a . The Zig Clean Colour Real Brush markers gave a totally different look to this card since they have incredible, juicy colors.
Here's the complete list of all the colors used:
n.51 Lemon Yellow - n.50 Yellow - n.25 Pale Pink - n.26 Light Pink - Peach Pink - Dark Pink - n.40 Green - n.46 Mid Green - n.71 Flesh Colour - n.61 Light Brown - n.64 Oatmeal

Card #4
Last but not least, I created a colorful fruity background using small stamps from set. I love to play with small stamps and give them the main focus on my cards. A patterned background is one of the easiest ways to do that.

Next, I decided to transform my pattern into a scalloped circle card with and added the heat embossed sentiment from the same set on a fish-tailed banner.

Leave a comment below letting me know what your favorite card was in this post. Thanks so much for stopping by and have a fabulous week!
This is a wonderful showcase of this fun stamp set. Thanks for sharing your creativity.
ReplyI love the "Squares" one!!!
Reply