

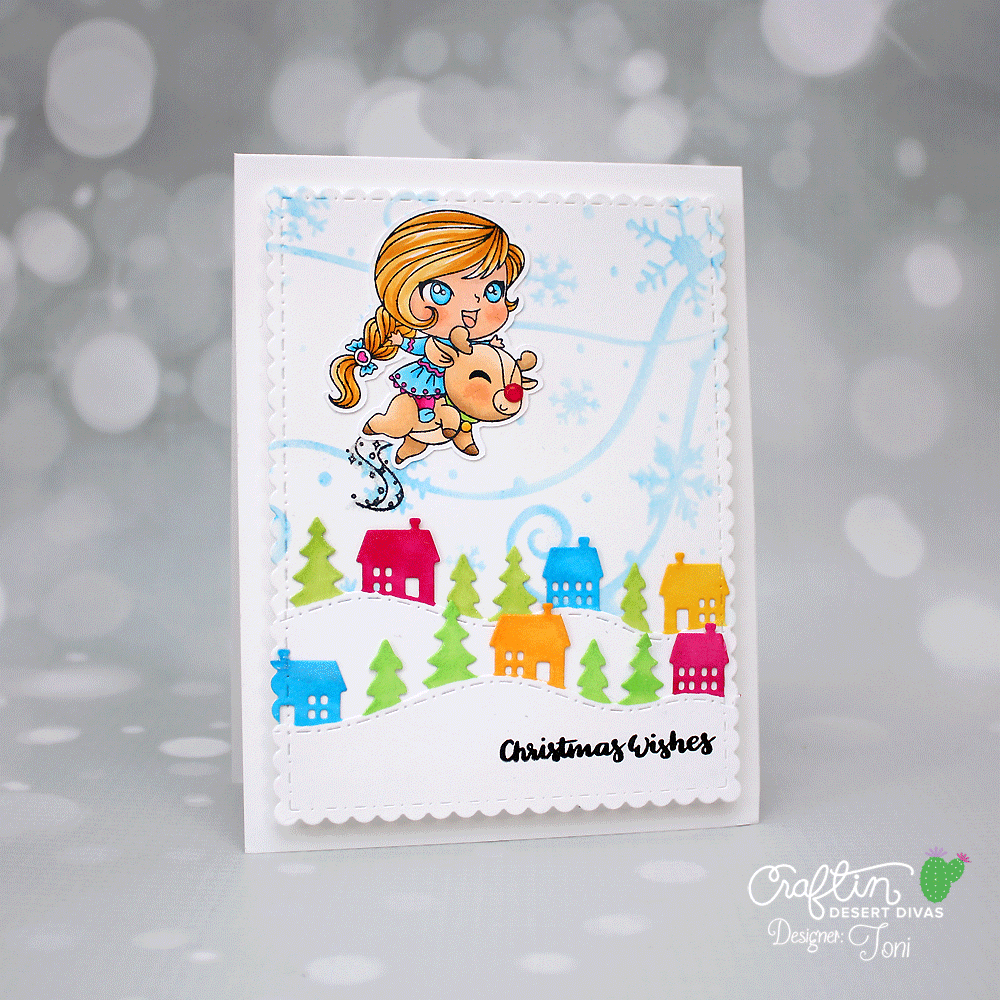
Hi Everyone! I'm sharing an interactive card with you today. Did you spot Rudolph's blinking nose? Beep beep! LOL.
I started out with the basic Chibi light components (conductive copper tape, a watch battery and a Chibi light). I had already done a mock up of the card so knew where I wanted the light and "push here" point to be. I thus prepared the card panel and image by making small holes for the light to show through. It's not absolutely necessary to do that but I did want to make sure the light would be as bright as possible.
I had stamped the image twice--once for coloring and once on the card front to make it easier to see where the hole for the light and push point needed to be.
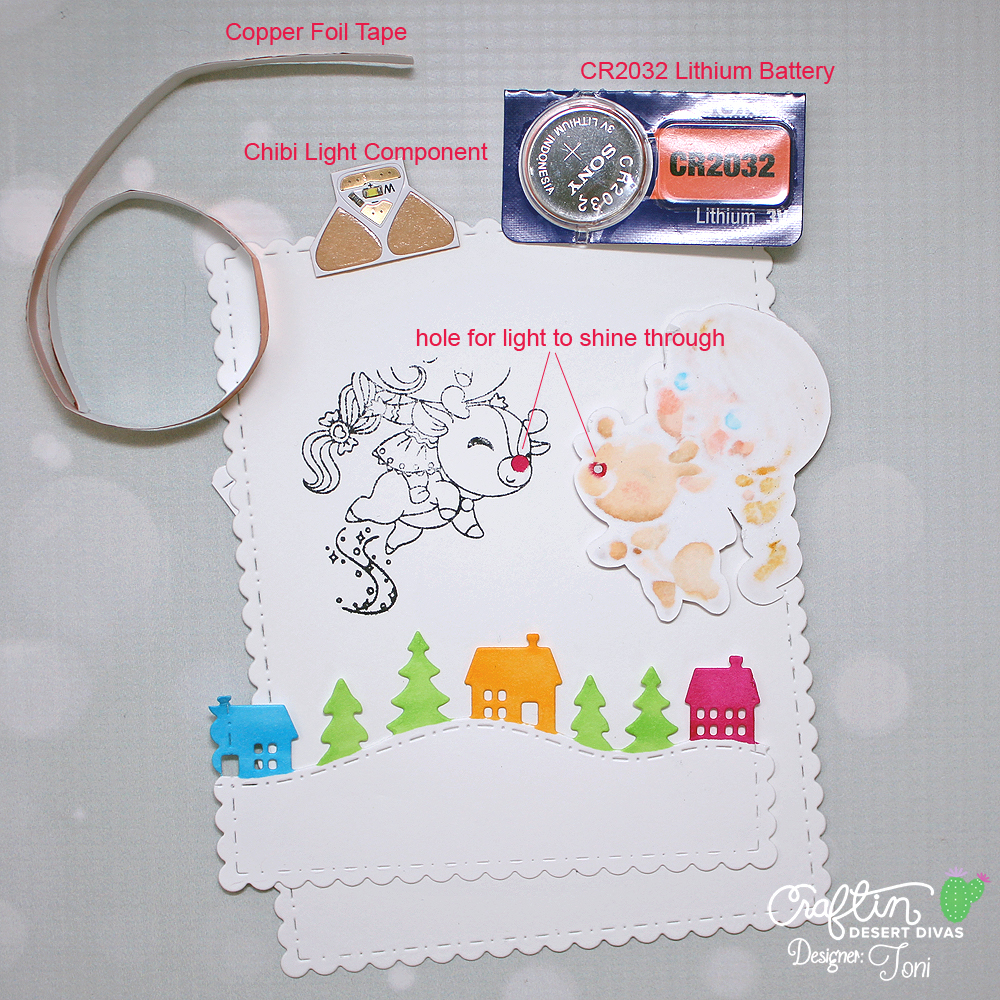
Next came the assembly of the light unit. I've done this a few times so have come up with cheats to help myself. These include using two layers of sticky-back foam to and dies to create the height needed for the components. Notice I had saved the diecut portion of the foam and used it to cover up the light except for that hole. I did this so the light would come only through the hole rather than lighting up the entire area there.
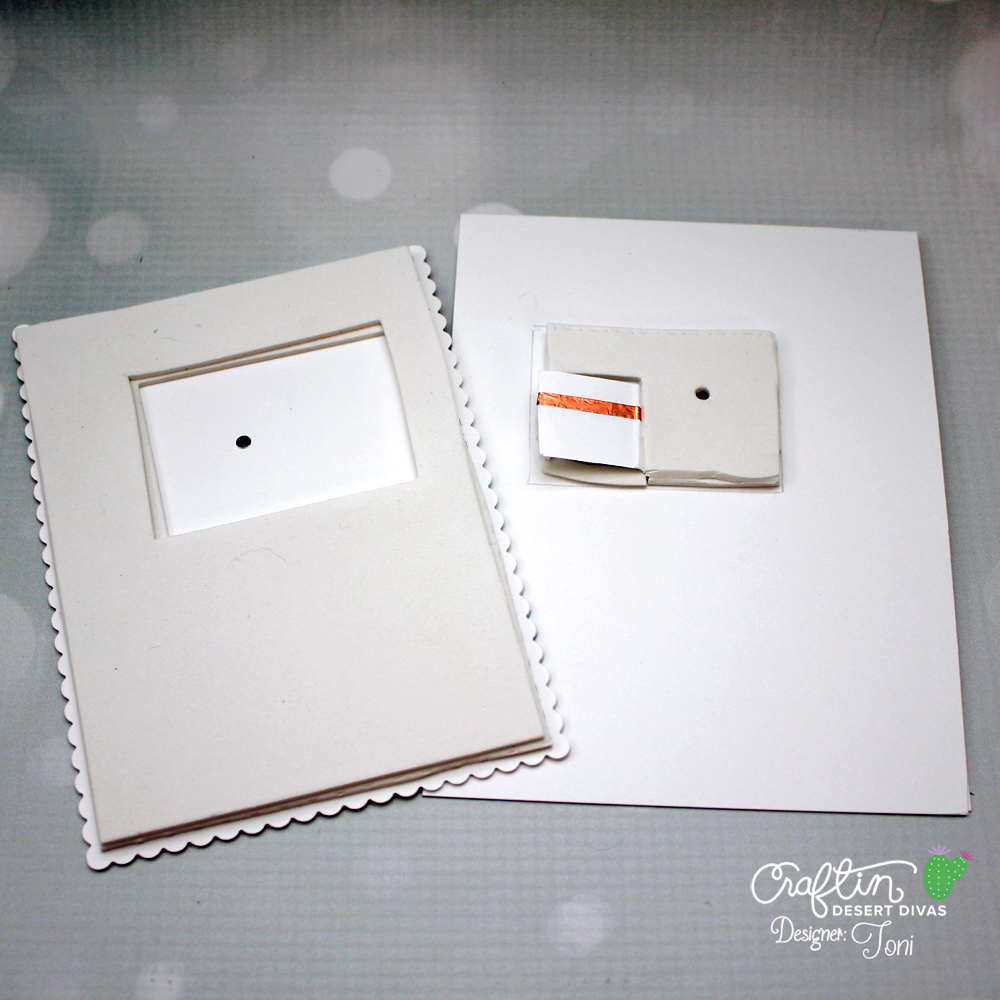
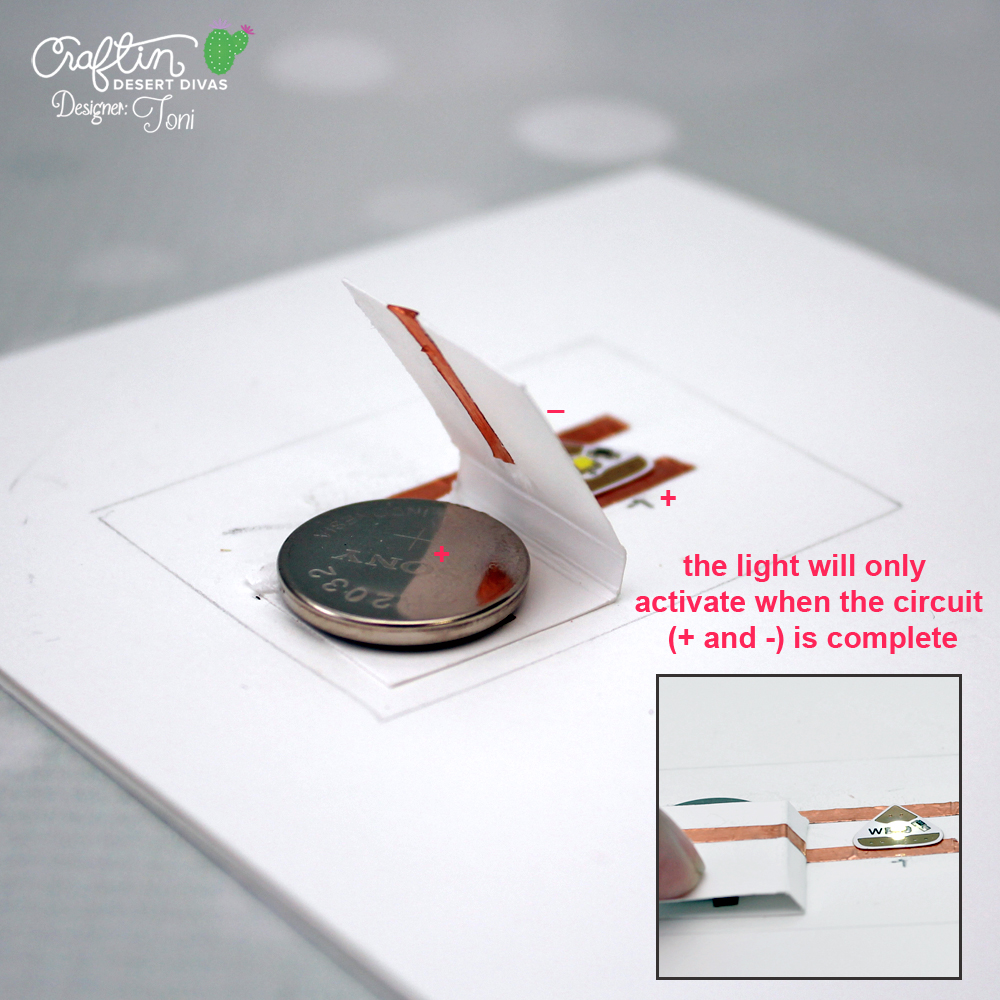
The Chibi light has a positive and negative side (noted in the photo) and you need to have a conductive copper line leading to/from both. Notice how I made a scored casing to hold the battery and to provide a place for the positive line to wrap up and over to reach the positive side of the battery. Also notice I had drawn where my card front opening was so I knew exactly how much space I had to work in.

Here you can see how the positive copper tape wraps over the scored casing. When the battery touches BOTH the positive and negative ends, the circuit is complete and the light will activate. Be sure to test that it works before you use the diecut foam to cover the components and finish up your card. By the way, I've had no difficulty with light activation when the foam covers the copper tape.
I assembled the card by adhering the front panel to the Chibi card base, stenciling the stencil using , adhering the two layers I had colored with Copics, and stamping the sentiment with .
COPICS
Skin: E00, E02 (blush), E11 (shadow)
Hair: YR0000, Y21, Y35, YR24
Clothes: B01, B02, B04, RV06
Scarf & Trees: YG03, YG05
Reindeer: E50, E51, E53, E55
Houses: B04, RV06, Y15, Y17


What an Adorable fun card !
ReplyOMG!! Your card is gorgeous!
Replythis is all kinds of perfect!!
Reply