Hi guys its design team member
Natalie on the CDD blog today to show you how to create this fun card by making stamps from your dies. Its such an easy technique all you need is a bit of fun foam, its also a great way to stretch your dies.
I started out by cutting out a sheet of white card using the this will become our base card. Turning the card landscape I laid out the to spell the word love and ran them through the die cutting machine. Cutting this out first will enable us to see where to place the heart stamps. I then used post it tape to temporarily stick the word love back together with the background card.
Next I began to create my stamps I choose two different heart dies the and the 3 hearts from the . To make the stamp just take the white fun foam and you literally just run the dies through your die cutting machine like normal, the fun foam cuts beautifully even with delicate dies. I then got my clear stamping block and run my tape runner on the top so that I could attach the foam cut stamp to it. Don't worry the tape comes off easily afterwards.
I began by using the heart stamp from the three hearts and started stamping towards the bottom as I wanted a heavier concentration of hearts at the bottom so that it looked like they were floating from the sky, As I began stamping using a range of red and pink oxide inks it became apparent my idea wasn't working it just looked like one hot mess! I think the hearts were just too big and the red just too heavy plus the heart were in a wonky line instead of being randomly stamped.

I wasn't about to give up on it yet though and I got my and just started working over the top of the card starting at the bottom and as I got towards the middle I switched to the and then added a touch of over the top. The hearts were still visible but they didn't look so harsh against the white background. I still wasn't sure on the candied apple hearts though so I took a white pigment ink and stamped over the top of them to tone them down a little. This looked much better so I began stamping one of the little hearts from the using the white pigment ink and the abandoned coral to give it a bokkeh effect.
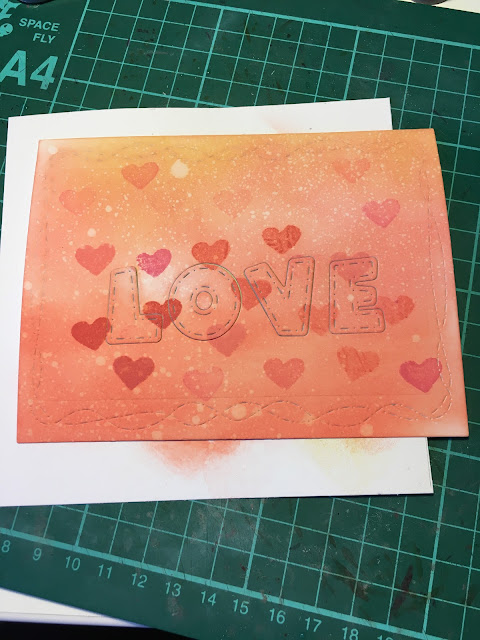
I felt like there was a lot of pink going on now though and it needed a pop of white to tone it down a little so I cut out a frame using the and cut out the word sending from the . I stuck both of these down to the base making sure the frame was straight and you could see a tiny bit of the pink sticking out on every side of the frame. Then I added the sending word die in white offset to the left and diagonal.
The word love is still temporarily stuck down so we will attach this next but first we need to get our card base ready I use precut and scored ones but because English sizes are different to American ones I usually have to chop a bit off around the edges. Once my card base was folded I could adhere the card to the base I unattached the word love making sure I didn't loose the centre of the O and put it to one side. I then ran the tape runner across the back of the card and adhered it to the base leaving around a 5mm white frame around it. The word love I attached with foam tape to make it stand out. Then I finished it off with a few .
I hope you enjoyed my tutorial and I wish you happy crafting!
Natalie


Pretty!!
Replybeautiful card, great idea, thanks for the inspiration!
Reply